The press is useable now but I have two more things I want to do with
it. I need to purchase a new belt for it and either make or purchase a
down stop.
Showing posts with label Craigslist. Show all posts
Sunday, May 3, 2020
Drill Press Part 5
I contacted a a bunch of different parts distributors trying to find the
resilient rings to mount the motor with. What I did find out was the
Marathon motor was originally sold to be used in an assembly for some
type of HVAC equipment and didn't have a standard catalogue number that
could be used to determine what rings were on it or if they were
proprietary to the installation. After wasting a massive amount of time
trying to find the correct resilient rings and purchasing two sets that
were "the right ones", I used the last set I purchased to center the
motor on the mount. I made some brackets, welded the case to the mount
and cut the ends off that attached to the resilient rings. Yesterday I
finished up the wiring and mounted a light I purchased off Amazon. I'm
very impressed with the build quality and brightness of the light for
its cost, its also a very nice 5 to 6k color. I will definitely buy a
couple more.
Thursday, April 16, 2020
Drill Press Part 4
I spent some time since last weekend searching for machine knobs. I
found some on Amazon but the delivery dates on them were at best in May.
I ended up finding some nice textured ones at Grainger for less than
$2.00ea.
I had an hour tonight to get the rods threaded and install them.
Tomorrow I'm contacting a Marathon distributor to see if I can figure out the resilient rings on the motor.
I had an hour tonight to get the rods threaded and install them.
Tomorrow I'm contacting a Marathon distributor to see if I can figure out the resilient rings on the motor.
Sunday, April 12, 2020
Drill Press Part 3
Today I spent the better part of the day trying to bead blast the wheels
for my corvette. The factory paint on them wasn't done very well and
one has some minor curb rash so I thought I would repaint them.
Unfortunately only blaster I have available to me large enough to put
them in had plastic media and while it would remove the paint I estimate
it would have taken me 3+ hours a wheel.
Because I wasted the better part of the day with that, I didn't get much done on my drill press.
I did get the quill spring cleaned, painted and installed, along with the motor plate which I some how forgot completely about when I blasted all the other parts. The plastic beads worked ok on it, I just need to paint it now.
I also got some quill handles made, this is one part I'm confused about. Every photo I have seen of this model has a quill handle that bolts to the end of the pinion. My pinion has a hole that is about 1/4" that is not very deep and not threaded, so I'm not very sure how the original handles attached. Anyway I made some from 1/2" rod and threaded them into a sleeve at a 18° angle. Now I just need to find something to use for knobs. I found an old umbrella handle but I don't really want to wait till I break two more.
Because I wasted the better part of the day with that, I didn't get much done on my drill press.
I did get the quill spring cleaned, painted and installed, along with the motor plate which I some how forgot completely about when I blasted all the other parts. The plastic beads worked ok on it, I just need to paint it now.
I also got some quill handles made, this is one part I'm confused about. Every photo I have seen of this model has a quill handle that bolts to the end of the pinion. My pinion has a hole that is about 1/4" that is not very deep and not threaded, so I'm not very sure how the original handles attached. Anyway I made some from 1/2" rod and threaded them into a sleeve at a 18° angle. Now I just need to find something to use for knobs. I found an old umbrella handle but I don't really want to wait till I break two more.
Saturday, April 11, 2020
Drill Press Part 2
Last weekend I borrowed my buddies blast cabinet and cleaned up most of the drill press castings. Wednesday it was warm enough here to paint what I had blasted.
The biggest pain was cleaning the support column, the rust on it was fairly thick but fortunately it didn't pit the metal.
I got about 70% of it put back together today.
I still have some details to figure out. It didn't have any quill feed handles or a depth stop, I think I can make both. The thing that has me a bit baffled right now is the motor mounts. It has a Marathon 1/2 horse motor with resilient ring mounts, the mounts are shot and I have no idea how to remove them from the end plates on the motor or what to buy to replace them. I have had zero luck matching the data plate to anything I can find online. I did find a major supplier for Marathon motors, I'm going to call them next week and see if I can get more information or what replacement rings to buy.
The biggest pain was cleaning the support column, the rust on it was fairly thick but fortunately it didn't pit the metal.
I got about 70% of it put back together today.
I still have some details to figure out. It didn't have any quill feed handles or a depth stop, I think I can make both. The thing that has me a bit baffled right now is the motor mounts. It has a Marathon 1/2 horse motor with resilient ring mounts, the mounts are shot and I have no idea how to remove them from the end plates on the motor or what to buy to replace them. I have had zero luck matching the data plate to anything I can find online. I did find a major supplier for Marathon motors, I'm going to call them next week and see if I can get more information or what replacement rings to buy.
Saturday, March 28, 2020
Drill Press Part 1
Picked up a new project today off of Craigslist, a Walker Turner 1200. From what information I can find it was built around 1948-1949.
The good:
The bad:
I have it mostly apart now and plan not to fully restore it but make it functionally sound as possible. Its my first drill press and I don't know much about them so it should be fun
The good:
- It was cheap.
- The bearings feel good with no play.
- It runs
- It has a nice large base
- The table is relatively undamaged
The bad:
- No low speed
- The belt cover is missing
- The quill handles are missing
- The depth stop is missing
I have it mostly apart now and plan not to fully restore it but make it functionally sound as possible. Its my first drill press and I don't know much about them so it should be fun
Wednesday, September 4, 2019
Vice Cleanup
Tania and I took this week off for a staycation and I have a few projects I want to get done.
A while back I broke the retaining bolt in my HF vice trying to tighten it too much. It pulled the threads right out of the casting holding the nut in place and cracked it. I looked at some of the Wilton BASH vices but read mixed reviews on them, so I got my hands on a mid 90s Wilton 450S.
The vice was mechanically sound other than a few drill starts along the top and some dents in the back jaw where someone beat on it with a hammer.
Thanks to the great information on the Garage Journal forum I was able to take it apart, clean it up and repaint in about six hours. Not a museum restoration I just wanted it to look nice again. The most difficult part and what took the longest was flat filing the back jaw to remove most of the damage. There are still three marks that weren't worth the amount of material I would need to remove for something that was basically cosmetic.
The vice is mounted to a hitch plate which slides into a receiver I welded to the bottom of the work bench. It lets me move the vice out of the way to use both benches.
I like keeping the original machining marks on steel or aluminum whenever possible. The shaft on the front jaw wasn't heavily corroded but wasn't going to wipe clean either. I used a nylon wheel on it which cleaned it very well without leaving any marks like a wire wheel or sand paper would.
A while back I broke the retaining bolt in my HF vice trying to tighten it too much. It pulled the threads right out of the casting holding the nut in place and cracked it. I looked at some of the Wilton BASH vices but read mixed reviews on them, so I got my hands on a mid 90s Wilton 450S.
The vice was mechanically sound other than a few drill starts along the top and some dents in the back jaw where someone beat on it with a hammer.
Thanks to the great information on the Garage Journal forum I was able to take it apart, clean it up and repaint in about six hours. Not a museum restoration I just wanted it to look nice again. The most difficult part and what took the longest was flat filing the back jaw to remove most of the damage. There are still three marks that weren't worth the amount of material I would need to remove for something that was basically cosmetic.
The vice is mounted to a hitch plate which slides into a receiver I welded to the bottom of the work bench. It lets me move the vice out of the way to use both benches.
I like keeping the original machining marks on steel or aluminum whenever possible. The shaft on the front jaw wasn't heavily corroded but wasn't going to wipe clean either. I used a nylon wheel on it which cleaned it very well without leaving any marks like a wire wheel or sand paper would.
Saturday, May 4, 2019
Steering Column
One of the few things I have never liked about the Corvette is the driving position. It seemed no matter how I adjusted the seat or the tilt column I could never find the right spot. Specifically I didn't like sitting so far away from the steering wheel, I have always liked it fairly close.
In most cars you can just move the seat closer and its problem solved. In the Corvette moving the seat closer puts my knees into the bolster and I am unable to use the clutch properly. This problem was very apparent when I went open tracking and felt like I was fighting the car instead of controlling the car. My arms extended straight to the wheel made it a very tiring experience along with making me drive much slower.
After that weekend I started researching options to move the steering wheel closer to the seat.
Option 1 was to buy a telescopic steering column ($350-$400).
Option 2 was to buy a custom made steering wheel with a deeper dish to the wheel ($1,500+).
Option 3 was to buy a quick release steering hub, after market steering wheel, 5 point harnesses to make up for no airbag and a track bar to mount them to ($2,000).
None of those options seemed reasonable at the time, so I did nothing.
A few weeks ago I was looking on Ebay for a trim piece and came across a column for $250.00, so I started searching to see if they had dropped in price. I ended up finding a column from a 2012 with 18k miles on it for $100.00 shipped. It was also a complete column with all the controls, clock spring and trim pieces installed.
After taking the disconnecting the battery the air bag and steering wheel took maybe 15 minutes to remove. Fairly simple stuff, I've had both off the car 3-4 times before. The column itself has one connector for all of the controls and one for the airbags. After disconnecting those, there was one cross bolt though the steering shaft and four bolts holding the column in place.
While the physical structure of the columns were completely different the mounting points and connectors were the same. The mounts are slotted so I was able to move the column towards the driver an additional 1/4" while installing it.
Once installed and after driving the telescopic motor fully extended the column moved the steering wheel 1.5" closer to the driver. Everything on the column worked properly except the telescopic motor, without memory seats in the car there is nothing to power or control the motor. I plan to rectify this with either a pair of relays or an H-Drive circuit, either way should be fairly easy to wire up.
In addition to replacing the column I took the drivers seat out while the steering wheel was removed. Its far from necessary but makes it that much easier to remove. This allowed me to easily access the drivers side seat belt. Over the last year or so it had become very slow to retract and many times would not retract without help. While I was looking for a replacement I came across a video on YouTube where the author claimed he had the fix for most all seat belts with this problem. He went on to explain that the oils from your skin and hands along from dirt the belt attracts would cause it to swell up and then become too large to retract properly. In the video he cleaned about 60% of a belt by soaking it in water mixed with detergent. I basically did the same thing but by removing it I was able to soak closer to 95% of the belt.
This picture shows the belt after soaking for about five hours. The water turned almost oily with a small amount of dirt in the bottom.
After reinstalling it along with the seat the belt retracted like it was a new assembly, I was actually quite suprised that it worked this well.
In most cars you can just move the seat closer and its problem solved. In the Corvette moving the seat closer puts my knees into the bolster and I am unable to use the clutch properly. This problem was very apparent when I went open tracking and felt like I was fighting the car instead of controlling the car. My arms extended straight to the wheel made it a very tiring experience along with making me drive much slower.
After that weekend I started researching options to move the steering wheel closer to the seat.
Option 1 was to buy a telescopic steering column ($350-$400).
Option 2 was to buy a custom made steering wheel with a deeper dish to the wheel ($1,500+).
Option 3 was to buy a quick release steering hub, after market steering wheel, 5 point harnesses to make up for no airbag and a track bar to mount them to ($2,000).
None of those options seemed reasonable at the time, so I did nothing.
A few weeks ago I was looking on Ebay for a trim piece and came across a column for $250.00, so I started searching to see if they had dropped in price. I ended up finding a column from a 2012 with 18k miles on it for $100.00 shipped. It was also a complete column with all the controls, clock spring and trim pieces installed.
After taking the disconnecting the battery the air bag and steering wheel took maybe 15 minutes to remove. Fairly simple stuff, I've had both off the car 3-4 times before. The column itself has one connector for all of the controls and one for the airbags. After disconnecting those, there was one cross bolt though the steering shaft and four bolts holding the column in place.
While the physical structure of the columns were completely different the mounting points and connectors were the same. The mounts are slotted so I was able to move the column towards the driver an additional 1/4" while installing it.
In addition to replacing the column I took the drivers seat out while the steering wheel was removed. Its far from necessary but makes it that much easier to remove. This allowed me to easily access the drivers side seat belt. Over the last year or so it had become very slow to retract and many times would not retract without help. While I was looking for a replacement I came across a video on YouTube where the author claimed he had the fix for most all seat belts with this problem. He went on to explain that the oils from your skin and hands along from dirt the belt attracts would cause it to swell up and then become too large to retract properly. In the video he cleaned about 60% of a belt by soaking it in water mixed with detergent. I basically did the same thing but by removing it I was able to soak closer to 95% of the belt.
This picture shows the belt after soaking for about five hours. The water turned almost oily with a small amount of dirt in the bottom.
After reinstalling it along with the seat the belt retracted like it was a new assembly, I was actually quite suprised that it worked this well.
Sunday, July 22, 2018
Parts Storage
Over the years I have collected literally boxes and boxes of aviation hardware. Its not useful to me because I don't know the majority of what I have. Last month I noticed a hanging bin cabinet for sale on Craigslist for $100.00 minus the bins. I didn't know that I wanted to take the plunge on a large bin cabinet so I blew it off until last weekend. Id looked up some options for just hanging bins but I didn't find anything that I liked or that was really even cost effective. So I texted the guy with the cabinet and Matty went with me to Greenwood to look at it.
Other than being really dirty the cabinet was in really good shape. Since the guy had the ad up for it for over three months and he had no bins for it I offered him $60.00 which he took and we loaded up.
When we had loaded it I notices something was up with the feet on the bottom of the cabinet. After we got it home and I could lay it down and look closer I realized they were extended nearly all the way out and had bent over from people sliding the cabinet around. I took them out of the cabinet and dollied the floor back to flat. The feet themselves were relatively undamaged so I added large area washers to the openings and put the feet back in.
I gave the cabinet a good bath and after drying it I hit it with the power buffer and a good coat of wax. Generally cabinets like this spend their lives in an industrial environment and look pretty rough. This one is in really good shape with really only a couple paint scratches.
All the boxes on the floor around the cabinet have the hardware I want to load in it.
The cabinet is 36"W x 24"D x 72"H, 16 Gauge welded steel. I am not sure who makes it, it looks exactly like the cabinets sold by Global Industries. Their cabinets have a logo on the upper left corner of the left door which I believe is just a decal, this cabinet has no decals or stampings.
Last week I ordered 96ea 4-1/8 x 5-3/8 x 3 bins to fill the doors and 24ea 5-1/2 x 10-7/8 x 5 bins for the back wall. The bins set me back $150.00 and there is room for 40ea more of the large ones.
Today I cleared a spot on the wall next to the compressor and started loading it up, I basically have the bins 90% full and still have half the hardware to go through. I may look at purchasing bin dividers before I buy the last 40 bins.
I have $210.00 invested at this point and I have no fear that I cant get that back for it easily. A Global cabinet with the same bin loading sells for just over $1,000.00.
It may take a while but every time I'm able to use something from the cabinet versus buying hardware it starts paying for itself.
Other than being really dirty the cabinet was in really good shape. Since the guy had the ad up for it for over three months and he had no bins for it I offered him $60.00 which he took and we loaded up.
When we had loaded it I notices something was up with the feet on the bottom of the cabinet. After we got it home and I could lay it down and look closer I realized they were extended nearly all the way out and had bent over from people sliding the cabinet around. I took them out of the cabinet and dollied the floor back to flat. The feet themselves were relatively undamaged so I added large area washers to the openings and put the feet back in.
I gave the cabinet a good bath and after drying it I hit it with the power buffer and a good coat of wax. Generally cabinets like this spend their lives in an industrial environment and look pretty rough. This one is in really good shape with really only a couple paint scratches.
All the boxes on the floor around the cabinet have the hardware I want to load in it.
The cabinet is 36"W x 24"D x 72"H, 16 Gauge welded steel. I am not sure who makes it, it looks exactly like the cabinets sold by Global Industries. Their cabinets have a logo on the upper left corner of the left door which I believe is just a decal, this cabinet has no decals or stampings.
Last week I ordered 96ea 4-1/8 x 5-3/8 x 3 bins to fill the doors and 24ea 5-1/2 x 10-7/8 x 5 bins for the back wall. The bins set me back $150.00 and there is room for 40ea more of the large ones.
Today I cleared a spot on the wall next to the compressor and started loading it up, I basically have the bins 90% full and still have half the hardware to go through. I may look at purchasing bin dividers before I buy the last 40 bins.
I have $210.00 invested at this point and I have no fear that I cant get that back for it easily. A Global cabinet with the same bin loading sells for just over $1,000.00.
It may take a while but every time I'm able to use something from the cabinet versus buying hardware it starts paying for itself.
Sunday, February 18, 2018
New Hooptie
After another long week in beautiful Rockford IL, I was looking forward to going home and spending a night in my own bed. The drive between Brownsburg and Rockford has to be one of the most boring drives a person could make. Most notably the stretch between Normal IL and Rockford IL. The trees along the highway are bent at their tops permanently, indicating not only the prevalent wind direction, but also a place I would never want to live. Apparently I am not the only one that thinks that way because there is nothing out there except some wind generators.
After making the 270 mile drive back home my son was waiting in the GMC at Hertz when I pulled in to drop off my car.I have made the drive enough times now that when I leave Rockford I can call him and give him a five minute window in which I will be arriving home.
After turning in the keys I climbed into the truck and Matty said, "Is it ok if we go look at a car"?
Not really my first idea of relaxation after driving through the snow for 270 miles.
I know he has been looking for a while, so I said "sure where is it"? to which he replied "a little north of South Bend".
The only thing north of South Bend besides Canada is Michigan. To make matters worse it was 5:30 and we would need to drive through some of the heaviest traffic in Indy during rush hour to get there.
Immediately I started formalizing reasons for why this would be a better trip to make on Saturday. Which he clearly expected because he had logical answers for everything. You can sleep and Ill drive. Its a Friday night he might sell it tonight. If we go tonight it wont ruin your day tomorrow.
Most of that was true except for the sleep on they way up part.
Once we got there and he looked at the car I knew right away I would be driving the 150 miles home so he could drive the car back.
He managed to find a two owner 2004 Jetta GLI with 27k original miles for $6500.00. I was skeptical as he was telling me about it on the drive up. But once we looked at the car it was apparent it was the original mileage. There are simple things you can look at such as the leather on the steering wheel and shift knob, the wear on the Recaro seats and the condition of carpet and sill plate, all of which looked new.
We both drove the car a few miles, it ran well and had no squeaks or rattles with very little wind noise.Apparently the seller was related to the original owner who purchased the car as more of toy / project / weekend car. He had done a lot of modifications to it, a Stage III turbo kit (you can see the massive intercooler and ducting though the front bumper), Euro headlights, lowering struts, stainless exhaust and a massive stereo with a overhead drop down screen. The modifications were the only thing that concerned me about the car, the wiring for the fog lights was very poorly done and some of it actually looked damaged. The had acquired the car intending to keep it but apparently his wife didn't like it or something so he had only had it a few months.
Other than a small paint blemish on the front bumper and the passenger mirror cover missing, the car looked like it was 1-2 years old. The paint on it is in really good shape for being 14 years old. The underside was clean, the brakes looked good and the tires looked to be fairly new. It was obvious it was well taken care of.
The previous owner also de-badged the car and put in an aftermarket front grille, which at a glance makes it look as much like a old BMW as a Volkswagen.
The day ended with me traveling almost 600 miles, but it was worth it for Matty. This should be a good car for him and last him quite a few years.
After making the 270 mile drive back home my son was waiting in the GMC at Hertz when I pulled in to drop off my car.I have made the drive enough times now that when I leave Rockford I can call him and give him a five minute window in which I will be arriving home.
After turning in the keys I climbed into the truck and Matty said, "Is it ok if we go look at a car"?
Not really my first idea of relaxation after driving through the snow for 270 miles.
I know he has been looking for a while, so I said "sure where is it"? to which he replied "a little north of South Bend".
The only thing north of South Bend besides Canada is Michigan. To make matters worse it was 5:30 and we would need to drive through some of the heaviest traffic in Indy during rush hour to get there.
Immediately I started formalizing reasons for why this would be a better trip to make on Saturday. Which he clearly expected because he had logical answers for everything. You can sleep and Ill drive. Its a Friday night he might sell it tonight. If we go tonight it wont ruin your day tomorrow.
Most of that was true except for the sleep on they way up part.
Once we got there and he looked at the car I knew right away I would be driving the 150 miles home so he could drive the car back.
He managed to find a two owner 2004 Jetta GLI with 27k original miles for $6500.00. I was skeptical as he was telling me about it on the drive up. But once we looked at the car it was apparent it was the original mileage. There are simple things you can look at such as the leather on the steering wheel and shift knob, the wear on the Recaro seats and the condition of carpet and sill plate, all of which looked new.
We both drove the car a few miles, it ran well and had no squeaks or rattles with very little wind noise.Apparently the seller was related to the original owner who purchased the car as more of toy / project / weekend car. He had done a lot of modifications to it, a Stage III turbo kit (you can see the massive intercooler and ducting though the front bumper), Euro headlights, lowering struts, stainless exhaust and a massive stereo with a overhead drop down screen. The modifications were the only thing that concerned me about the car, the wiring for the fog lights was very poorly done and some of it actually looked damaged. The had acquired the car intending to keep it but apparently his wife didn't like it or something so he had only had it a few months.
Other than a small paint blemish on the front bumper and the passenger mirror cover missing, the car looked like it was 1-2 years old. The paint on it is in really good shape for being 14 years old. The underside was clean, the brakes looked good and the tires looked to be fairly new. It was obvious it was well taken care of.
The previous owner also de-badged the car and put in an aftermarket front grille, which at a glance makes it look as much like a old BMW as a Volkswagen.
The day ended with me traveling almost 600 miles, but it was worth it for Matty. This should be a good car for him and last him quite a few years.
Monday, August 1, 2016
Tire shopping
Last Saturday I went to Discount Tire to buy some new tires for the Corvette. I wore probably 2/3rds of the tread at Putnam last fall and the front tires were very thin at the inner edges. Over the last few months I had researched what tires I wanted. I was not very happy with the Nitto Invos on the car and I wanted a higher performance tire. The tires I was looking at fall under the "Extreme Performance Summer Tire" category, unfortunately no one makes a tire that fits my car in that category. The TSW rims I have on the car are one size larger in diameter and one inch wider, the width isn't the problem its the diameter. They are actually the same diameters as the C7 Z51 Corvettes, but most of the tires available in those sizes are run flats.
I initially inquired about some 2015 model BFGoodrich Rivals which are very limited availability, and of course they were unavailable. Then I asked him to check on Continental Sport Contacts again they were unavailable. He said he could check with some alternative warehouses on Monday, so before I left I asked if they would put my tires on the spin-balancer and make sure none were bent. I have already replaced two of the wheels for being bent and I found out a few months ago that TSW no longer makes them. If I have any bent wheels that would change everything.
Twenty minutes later they called me out to the shop to show me that both back wheels were out of round. Basically the inner barrel farthest away from the spokes was oval, no damage to the lips of the wheels and the same issue I had with the two wheels I had replaced. These are spun forged wheels and tend to be more malleable than a cast wheel which would just crack. Other than the total suck roads in this area I'm not sure what is causing this. Pot holes usually don't get a back wheel without damaging the front one.
I asked them to put the wheels back on the car and drove home to decide what to do next. Its strange that I could not hear or feel the .5" of run out on the back wheels.
The frustrating part is I really liked the wheels I had and outside of spending 4-5k on a forged set that are custom made there aren't really a ton of choices. I started looking on CL for a factory set, they come up quite often and are generally in the $600.00-$900.00 range for just the C6 rims. Of course there were none listed in the Indy area when I looked. There were a few sets in the Chicago area including a too good to be true price on a forged set. The guy had a bad picture posted of the wheels and a receipt that didn't match the wheels he had pictured.
Now I'm frustrated and ready to step away for a while but decided to check Louisville area first. I got a hit on some C7 wheels in black off a Z51 car, this is important because the Z51 wheels are spun forged. The seller had them listed for $200.00 which is just stupid cheap. I called him and he said he still had them but he had one person on the way to look at them and another he was to call if the first didn't take them. We talked about the rims for a few minutes and I told him he had listed them way too cheap, he agreed and said he didn't think he would have so many calls on them. I told him "It's too bad I can't just offer you $400.00 for them and you tell everyone else they are sold". he said he would have no problem doing that. We agreed to meet at his house and 5pm, so Tania and I jumped in the truck and headed to Louisville.
His house was easy to find and the entire transaction took less than 15 minutes. He had bought a new Z51, didn't like the black wheels so he bought some Chinese multi-spoke chrome replica wheels. He also threw in two sets of factory lug nuts, one chrome and one black. We were about a half mile from his house and deciding wither to eat or head home when my phone rang. It was him calling and asking me if I needed tires too. He said a buddy of his had a set that were almost new and he thought they were those "yoko" tires. We waited on the side of the road for him to drive by and followed him over to his buddy's house.
When we arrived his buddy was in his tiny garage, he had a new C7 as well and the tires were sitting next to it. I looked each of them over they weren't those "yoko" tires but better than that for me they were Hankook Ventis V-12 Evos. They had not patches and the buddy said he had maybe 1k miles on them, he went on to explain they were off his old Corvette. I have had a set of these before and was very happy with them, after dealing for a few minutes I agreed to $400.00 for the set. We had to drive about 8 miles to an ATM because I had only brought enough to buy the wheels.
While we were loading them in the truck, the seller asked me about my Corvette and it turned out he had the same car, same color and the same TSW wheels. He went on to tell me he still had some parts off the car, so we went in his garage to see what he had. He had a stock hood, some chrome and trim pieces I wasn't interested in, a set of TSW chrome wheels and tires and some RPI fuel rail covers that were color matched. I unwrapped one and took it outside to look at in the sun, he told me he would sell them for $100.00 (they are over $300.00 new) I was slightly interested but didn't feel like making the trek back to the ATM and it was getting late. I got his number and told him I would contact him if I decided I wanted them.
I got in the truck and Tania asked me what I was looking at, I told her what they were, how much they cost and what he wanted for them. She informed me that she had taken out $500.00 at the ATM so I thought about it a few minutes and then went and got the fuel rail covers from him.
Here is a shot of the wheels and tires he had put the rims in his replica boxes.
Here is a closeup of the rim, I painted the Corvette lettering to match the car, it was a lot harder than I thought it would be because the lettering is a very shallow recess. I don't know how well I will like the gloss black versus the flat black the current wheels are. The paint on them is not a real good quality which surprised me, I thought for a minute that these might be replicas but none of the replicas have CORVETTE cast in the lip of the rim.
Here is a shot with the RPI fuel rail covers installed. They purchase new GM fuel rail covers, paint them to match and insert black metal lettering in the recesses. I would have never spent the money on these had the price not been so cheap. I probably should have dickered more on the price since they only made C6's this color for like 3 years and they were low production, he didn't have much of a market. He did throw in the matching oil cap which I guess is a bonus.
It will probably cost me around $125.00 to have the TPS sensors removed from my old wheels, rebuild kits installed and the tires mounted and balanced. Still all in all I think I got a very good deal. Next I want to find some C6 center caps, I don't like the chrome trim ring on the C7 caps and I don't want the C7 logo's on my car. The logo is recessed into the cap or I would just cover them in vinyl.
I initially inquired about some 2015 model BFGoodrich Rivals which are very limited availability, and of course they were unavailable. Then I asked him to check on Continental Sport Contacts again they were unavailable. He said he could check with some alternative warehouses on Monday, so before I left I asked if they would put my tires on the spin-balancer and make sure none were bent. I have already replaced two of the wheels for being bent and I found out a few months ago that TSW no longer makes them. If I have any bent wheels that would change everything.
Twenty minutes later they called me out to the shop to show me that both back wheels were out of round. Basically the inner barrel farthest away from the spokes was oval, no damage to the lips of the wheels and the same issue I had with the two wheels I had replaced. These are spun forged wheels and tend to be more malleable than a cast wheel which would just crack. Other than the total suck roads in this area I'm not sure what is causing this. Pot holes usually don't get a back wheel without damaging the front one.
I asked them to put the wheels back on the car and drove home to decide what to do next. Its strange that I could not hear or feel the .5" of run out on the back wheels.
The frustrating part is I really liked the wheels I had and outside of spending 4-5k on a forged set that are custom made there aren't really a ton of choices. I started looking on CL for a factory set, they come up quite often and are generally in the $600.00-$900.00 range for just the C6 rims. Of course there were none listed in the Indy area when I looked. There were a few sets in the Chicago area including a too good to be true price on a forged set. The guy had a bad picture posted of the wheels and a receipt that didn't match the wheels he had pictured.
Now I'm frustrated and ready to step away for a while but decided to check Louisville area first. I got a hit on some C7 wheels in black off a Z51 car, this is important because the Z51 wheels are spun forged. The seller had them listed for $200.00 which is just stupid cheap. I called him and he said he still had them but he had one person on the way to look at them and another he was to call if the first didn't take them. We talked about the rims for a few minutes and I told him he had listed them way too cheap, he agreed and said he didn't think he would have so many calls on them. I told him "It's too bad I can't just offer you $400.00 for them and you tell everyone else they are sold". he said he would have no problem doing that. We agreed to meet at his house and 5pm, so Tania and I jumped in the truck and headed to Louisville.
His house was easy to find and the entire transaction took less than 15 minutes. He had bought a new Z51, didn't like the black wheels so he bought some Chinese multi-spoke chrome replica wheels. He also threw in two sets of factory lug nuts, one chrome and one black. We were about a half mile from his house and deciding wither to eat or head home when my phone rang. It was him calling and asking me if I needed tires too. He said a buddy of his had a set that were almost new and he thought they were those "yoko" tires. We waited on the side of the road for him to drive by and followed him over to his buddy's house.
When we arrived his buddy was in his tiny garage, he had a new C7 as well and the tires were sitting next to it. I looked each of them over they weren't those "yoko" tires but better than that for me they were Hankook Ventis V-12 Evos. They had not patches and the buddy said he had maybe 1k miles on them, he went on to explain they were off his old Corvette. I have had a set of these before and was very happy with them, after dealing for a few minutes I agreed to $400.00 for the set. We had to drive about 8 miles to an ATM because I had only brought enough to buy the wheels.
While we were loading them in the truck, the seller asked me about my Corvette and it turned out he had the same car, same color and the same TSW wheels. He went on to tell me he still had some parts off the car, so we went in his garage to see what he had. He had a stock hood, some chrome and trim pieces I wasn't interested in, a set of TSW chrome wheels and tires and some RPI fuel rail covers that were color matched. I unwrapped one and took it outside to look at in the sun, he told me he would sell them for $100.00 (they are over $300.00 new) I was slightly interested but didn't feel like making the trek back to the ATM and it was getting late. I got his number and told him I would contact him if I decided I wanted them.
I got in the truck and Tania asked me what I was looking at, I told her what they were, how much they cost and what he wanted for them. She informed me that she had taken out $500.00 at the ATM so I thought about it a few minutes and then went and got the fuel rail covers from him.
Here is a shot of the wheels and tires he had put the rims in his replica boxes.
Here is a closeup of the rim, I painted the Corvette lettering to match the car, it was a lot harder than I thought it would be because the lettering is a very shallow recess. I don't know how well I will like the gloss black versus the flat black the current wheels are. The paint on them is not a real good quality which surprised me, I thought for a minute that these might be replicas but none of the replicas have CORVETTE cast in the lip of the rim.
Here is a shot with the RPI fuel rail covers installed. They purchase new GM fuel rail covers, paint them to match and insert black metal lettering in the recesses. I would have never spent the money on these had the price not been so cheap. I probably should have dickered more on the price since they only made C6's this color for like 3 years and they were low production, he didn't have much of a market. He did throw in the matching oil cap which I guess is a bonus.
It will probably cost me around $125.00 to have the TPS sensors removed from my old wheels, rebuild kits installed and the tires mounted and balanced. Still all in all I think I got a very good deal. Next I want to find some C6 center caps, I don't like the chrome trim ring on the C7 caps and I don't want the C7 logo's on my car. The logo is recessed into the cap or I would just cover them in vinyl.
Sunday, May 1, 2016
P0601 Updates and Running Boards?
I spent last weekend tracing all the grounds on the Corvette and checking them for resistance. After that and some other small troubleshooting I couldn't find anything wrong with the Corvette. I drove it to Mike Norris Motorsports Friday and he confirmed that the ECU was the problem. I found an online service that repairs ECU's for $125.00 and if it is beyond repair they charge $75.00 for the diagnosis. The advantage to this is confirmation it is the ECU and if it is I wont need to have it reprogrammed with the default parameters and then with the dyno tune.
In researching this I found out I cannot buy a new ECU for the car pre-programmed. It can only be done by the dealer and must be installed in the car to learn the clutch pedal and I believe crank trigger. So today I cleaned up the car and removed the ECU to send out tomorrow.
Last week I also removed the running boards from the Sierra, I hated how they looked and hated even more all the crap that would end up on top of them. Two weeks ago it rained and the following day there were dead dried worms stuck all over the top of them. The truck is a bit harder to get in and out of now but it looks much better to me. I put them up on Craigslist yesterday and they sold in about an hour for $300.00 which is about what they are each.
I wasn't trying to stage a photo but after working on the Corvette and cleaning out the garage I realized I had them all lined up so I took a quick picture.
In researching this I found out I cannot buy a new ECU for the car pre-programmed. It can only be done by the dealer and must be installed in the car to learn the clutch pedal and I believe crank trigger. So today I cleaned up the car and removed the ECU to send out tomorrow.
Last week I also removed the running boards from the Sierra, I hated how they looked and hated even more all the crap that would end up on top of them. Two weeks ago it rained and the following day there were dead dried worms stuck all over the top of them. The truck is a bit harder to get in and out of now but it looks much better to me. I put them up on Craigslist yesterday and they sold in about an hour for $300.00 which is about what they are each.
I wasn't trying to stage a photo but after working on the Corvette and cleaning out the garage I realized I had them all lined up so I took a quick picture.
Sunday, January 4, 2015
Blast Cabinet
Now that the garage is useable again I was able to finish some projects
on the vehicles. The truck got a new water pump, lower radiator hose and
a good clean out of the overflow tank. I also replaced all of the
parking brake cables along with the 130k mile shocks. Along with the
clutch I put in it a few months ago it should be good for the winter.
This let me park the corvette for the winter and get it ready for some mods. When I did the headers last spring I noticed that the EGR connection at the intake had split, it was something I had put together after I got the car to fix the original owners glued together solution. I don't know what the rubber elbow was from but it wasn't going to last long and wasn't a good solution.
A better solution was the braided toilet tank fill line I replaced it with, I'm sure when found out I will be banned for life from any corvette forum, club etc.
In the garage this week I added a motor rated switch on the compressor, I wanted a light to indicate that it was on to basically tell me "hey dumbass turn me off" when I leave the garage. The switch works great the indicator light not so much it puts out all of .005 lumen. I need to figure out something brighter.
Today I ran a new drop for the cabinet, physically it only sits 12 feet from the compressor but I tapped into a leg in the middle of the garage and added 16 feet to put it around 35 feet from the compressor.
This let me park the corvette for the winter and get it ready for some mods. When I did the headers last spring I noticed that the EGR connection at the intake had split, it was something I had put together after I got the car to fix the original owners glued together solution. I don't know what the rubber elbow was from but it wasn't going to last long and wasn't a good solution.
A better solution was the braided toilet tank fill line I replaced it with, I'm sure when found out I will be banned for life from any corvette forum, club etc.
Right now the most recent dyno was 415/414, my plans for the winter are a
Spinmonster cam and possibly TFS heads I want a good solid 500 rwhp
naturally aspirated.
In the garage this week I added a motor rated switch on the compressor, I wanted a light to indicate that it was on to basically tell me "hey dumbass turn me off" when I leave the garage. The switch works great the indicator light not so much it puts out all of .005 lumen. I need to figure out something brighter.
The big thing this weekend though was finding this on CL.
The cabinet has good glass and new gloves, the gun is in good condition
and it came with three five gallon buckets of media and five new filters
for the dust collector. The previous owner removed the motor from the
dust collector, he said it had sucked up something that stopped the
motor. While he had it off he rigged up the canister to work with a shop
vac, but I got the original motor with the unit and it works fine so I
will be putting it back.
Today I ran a new drop for the cabinet, physically it only sits 12 feet from the compressor but I tapped into a leg in the middle of the garage and added 16 feet to put it around 35 feet from the compressor.
Friday, April 11, 2014
Glass Top
Wednesday night I was looking through Craigslist adds when I came across a "new glass top" for a C6 corvette.
All day Thursday I debated the pros and cons of owning one and finally that evening I decided to give the guy a call.
Apparently he had bought the top last fall, hurt his back, sold his corvette and the top had never been used. After putting it on my car and looking it over we struck an easy price which was about 50% off the retail cost of the top with a carrying bag.
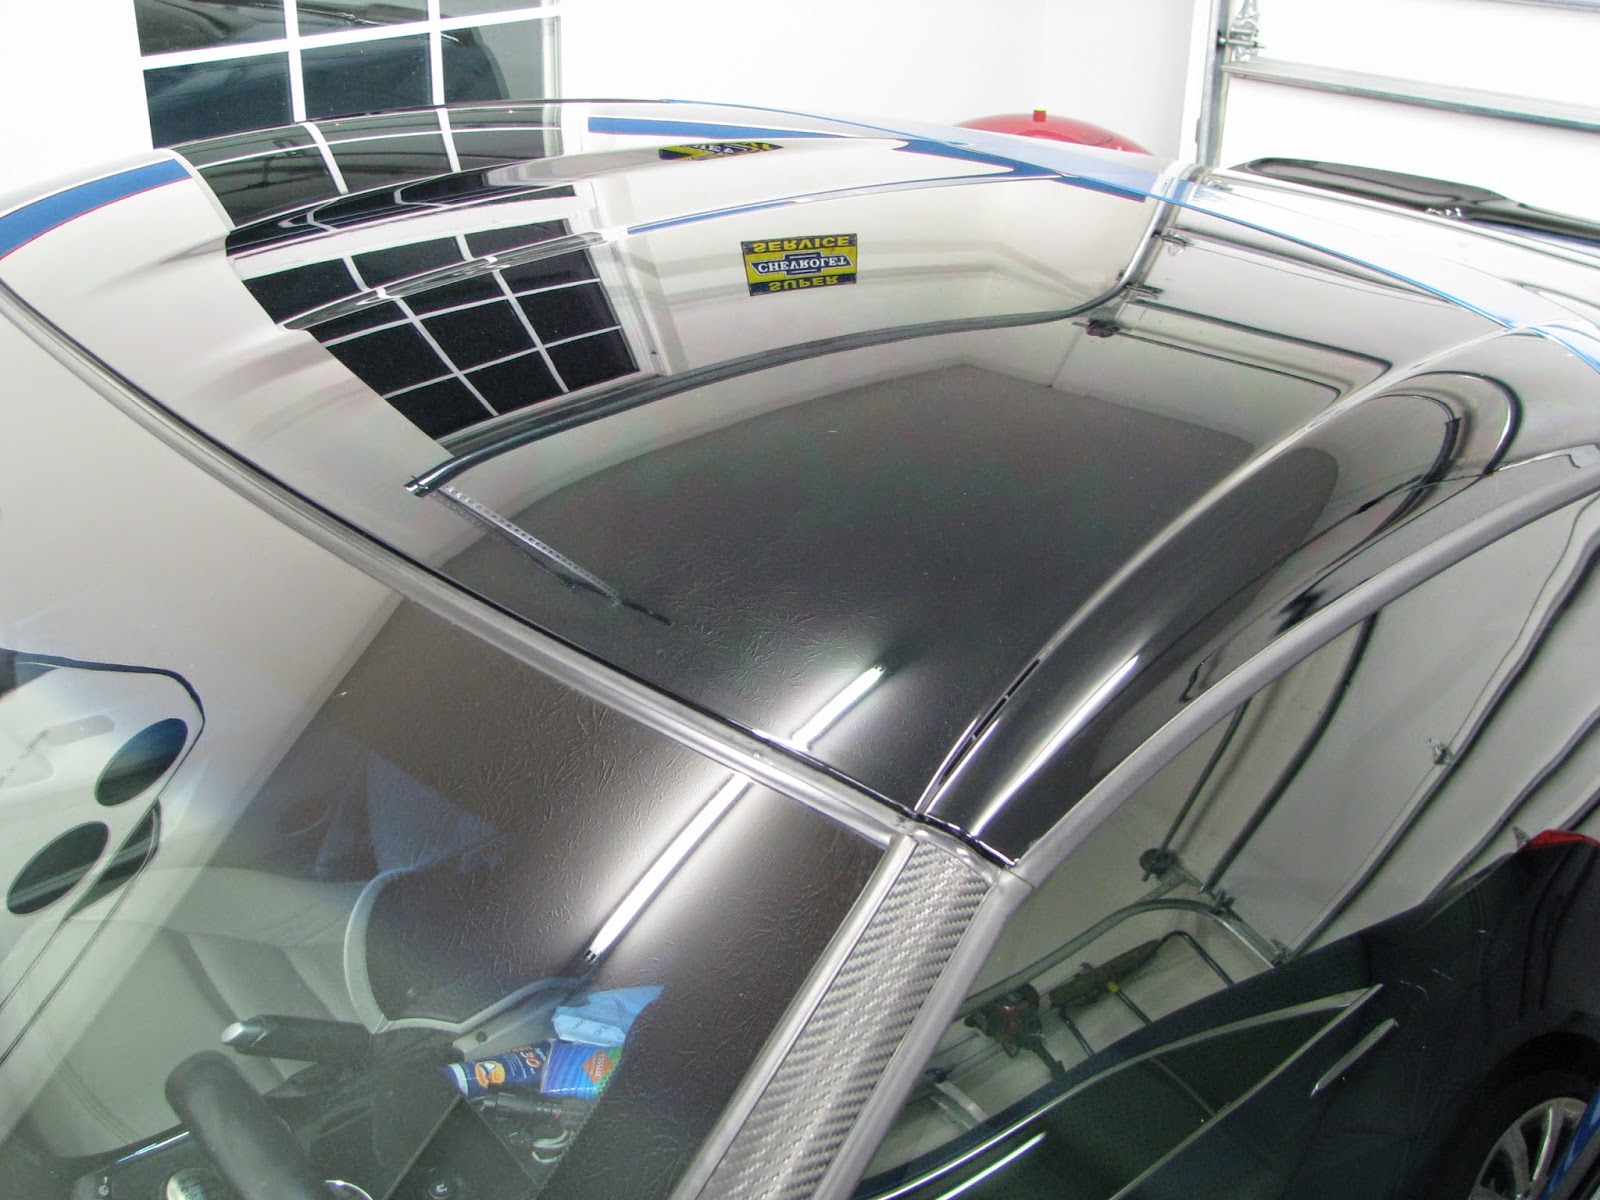
It looks like a top that came off a black car, or a top that is painted black.
Its dark enough that its hard to see in the car through it.
Looking out from the inside its a nice shade of blue simmilar to the shading at the top of the windshield.
All day Thursday I debated the pros and cons of owning one and finally that evening I decided to give the guy a call.
Apparently he had bought the top last fall, hurt his back, sold his corvette and the top had never been used. After putting it on my car and looking it over we struck an easy price which was about 50% off the retail cost of the top with a carrying bag.
It looks like a top that came off a black car, or a top that is painted black.
Its dark enough that its hard to see in the car through it.
Looking out from the inside its a nice shade of blue simmilar to the shading at the top of the windshield.
Sunday, December 16, 2012
Dry Cut Saw
I have been watching CL a while now for a abrasive chop saw. Last
weekend I came across a new listing for a 14" Milwaukee dry cut saw,
"barely used" for $200.00.
I only know a small bit about dry or cold cut saws and would normally research more before buying but this seemed like a deal I needed to jump on. It appears that the owner did not properly clamp whatever he was cutting. The blade was deflected into the edge of the throat causing only minor damage to the base.
Unfortunately the blade did not fare as well, initially I thought it was only a couple of broken teeth so I tried to remove it and found the outer flange had rotated on the spindle shaft
After fighting with it for over an hour I was able to get the flange off the spindle shaft. The damage was limited to the outer flange which I was able to order for less than $3.00.
The blade had damage to over 1/3 of the teeth, at $5.00 a tooth to replace I started looking for a new one. Because I didn't research this in advance I had no idea that ferrous dry cut blades were that expensive. The cheapest I could find a Milwaukee blade was in the $150 range with most other brands being $80 - $100. Even with buying a new blade the total cost would still be less than buying a new saw but more than I had planned on investing.
This week I debated selling the saw as is and looking again for a abrasive chop saw when I found a HD link selling the original blade for $35.97ea. Needless to say I selected 2 and blasted through the checkout pages.
I only know a small bit about dry or cold cut saws and would normally research more before buying but this seemed like a deal I needed to jump on. It appears that the owner did not properly clamp whatever he was cutting. The blade was deflected into the edge of the throat causing only minor damage to the base.
Unfortunately the blade did not fare as well, initially I thought it was only a couple of broken teeth so I tried to remove it and found the outer flange had rotated on the spindle shaft
After fighting with it for over an hour I was able to get the flange off the spindle shaft. The damage was limited to the outer flange which I was able to order for less than $3.00.
The blade had damage to over 1/3 of the teeth, at $5.00 a tooth to replace I started looking for a new one. Because I didn't research this in advance I had no idea that ferrous dry cut blades were that expensive. The cheapest I could find a Milwaukee blade was in the $150 range with most other brands being $80 - $100. Even with buying a new blade the total cost would still be less than buying a new saw but more than I had planned on investing.
This week I debated selling the saw as is and looking again for a abrasive chop saw when I found a HD link selling the original blade for $35.97ea. Needless to say I selected 2 and blasted through the checkout pages.
Wednesday, September 19, 2012
Matty's First Car
Last Saturday Tania and I were able to find Matty his first car. I had searched on CL for a few weeks and decided on a budget more than the vehicle type. Matty wanted a Miata which met one of my criteria points of being reasonably safe, the problem being most were well over double what I had decided for a budget. Friday night I found one that was close and with the intent of some negotiation we set up an appointment to look at it. Before we left the house I called on two other cars and had numbers for an additional four.
During the hour long drive to meet the Miata owner I decided to do a local dealer search on my phone and found a 2005 Cavalier listed for 3k which I called to verify it was still available. I had not seen anything near that new at that price level through private individuals or dealers. My intent was to find a dealer that might have two or three vehicles that met some of my criteria.
We met the Miata owner and looked over the car, it was a 92 with 134k and a brand new paint job. The paint on it was white and a fair paint job, the wheels were spray bombed black and overall the car looked very good for being 20 years old. I drove the car and it had few rattles, was amazingly gutless, handled nice for its age and had horribly hard seats. The owner was asking 4k and was willing to negotiate, I told him I had other cars to look at and we left.
We then drove to the dealer with the Cavalier and after asking about it the first thing they told me was "you do know this is a manual transmission". That being what Matty wanted and being an obvious problem for them was a good negotiation point. The car itself has 137k miles, new tires and brakes, air-conditioning, AM/FM/CD, Tilt Steering, Remote Trunk Opener, fold down rear seats and some exterior package I have not been able to identify which included Rally Stripes and a factory rear wing.
After a 15 minute test drive and some opening negotiations we ended up leaving the sales person in the showroom and were seated at the owners desk. Through the process of apparently "stealing food from the mouths of my children" I was able to negotiate an out the door price of 2800 which included tax and license fees.
The reward for my satisfying negotiation was a bright orange check engine light illuminating 10 seconds after pulling off the lot. I drove it over to an auto parts store and the code was a P0141 aft 02 sensor. It was a fairly painless replacement and despite the mileage on the car it runs very strong. The only true problems with it are of a cosmetic nature. The car is from Georgia and has some UV damage which compounds the normal UV damage that most Cavaliers have. The plastic trim at the base of the windshield as well as the bezel around the gauges are both broken and cracked. I have plans for repairing them. Another area of UV damage is to the rally stripes which are made of vinyl and have split and cracked. For now I will just remove them and then decide later with Matty if we want to replace them.
The last area was the headlamps which were damaged worse than I have ever seen. After burning up three sheets of 120 grit DA paper on the driver side headlamp I decided to try and fill in the remaining cracks with lacquer thinner. This worked well and I was able to work up through the grits until I polished them clear again. These before pictures were taken after the dealership had washed the car, we removed the light housings and washed them.
Matty wont be able to drive solo until December, so I plan on driving the car off and on over the next few months to make sure there are no problems with it. It should be very economical to operate and the parts are very cheap for it, the headlamp housings new are less than $50.00 for the pair, fixing them was more about showing Matty that not everything needs to be thrown away and replaced with new.
During the hour long drive to meet the Miata owner I decided to do a local dealer search on my phone and found a 2005 Cavalier listed for 3k which I called to verify it was still available. I had not seen anything near that new at that price level through private individuals or dealers. My intent was to find a dealer that might have two or three vehicles that met some of my criteria.
We met the Miata owner and looked over the car, it was a 92 with 134k and a brand new paint job. The paint on it was white and a fair paint job, the wheels were spray bombed black and overall the car looked very good for being 20 years old. I drove the car and it had few rattles, was amazingly gutless, handled nice for its age and had horribly hard seats. The owner was asking 4k and was willing to negotiate, I told him I had other cars to look at and we left.
We then drove to the dealer with the Cavalier and after asking about it the first thing they told me was "you do know this is a manual transmission". That being what Matty wanted and being an obvious problem for them was a good negotiation point. The car itself has 137k miles, new tires and brakes, air-conditioning, AM/FM/CD, Tilt Steering, Remote Trunk Opener, fold down rear seats and some exterior package I have not been able to identify which included Rally Stripes and a factory rear wing.
After a 15 minute test drive and some opening negotiations we ended up leaving the sales person in the showroom and were seated at the owners desk. Through the process of apparently "stealing food from the mouths of my children" I was able to negotiate an out the door price of 2800 which included tax and license fees.
The reward for my satisfying negotiation was a bright orange check engine light illuminating 10 seconds after pulling off the lot. I drove it over to an auto parts store and the code was a P0141 aft 02 sensor. It was a fairly painless replacement and despite the mileage on the car it runs very strong. The only true problems with it are of a cosmetic nature. The car is from Georgia and has some UV damage which compounds the normal UV damage that most Cavaliers have. The plastic trim at the base of the windshield as well as the bezel around the gauges are both broken and cracked. I have plans for repairing them. Another area of UV damage is to the rally stripes which are made of vinyl and have split and cracked. For now I will just remove them and then decide later with Matty if we want to replace them.
The last area was the headlamps which were damaged worse than I have ever seen. After burning up three sheets of 120 grit DA paper on the driver side headlamp I decided to try and fill in the remaining cracks with lacquer thinner. This worked well and I was able to work up through the grits until I polished them clear again. These before pictures were taken after the dealership had washed the car, we removed the light housings and washed them.
Matty wont be able to drive solo until December, so I plan on driving the car off and on over the next few months to make sure there are no problems with it. It should be very economical to operate and the parts are very cheap for it, the headlamp housings new are less than $50.00 for the pair, fixing them was more about showing Matty that not everything needs to be thrown away and replaced with new.
Monday, May 10, 2010
Ceiling Storage
A couple of months ago I found a Craigslist add for a clothing warehouse that was going out of business and had shelving for sale. I was not interested in any for myself as I was for shelving for work. The shelves they had listed were industrial type "rivet" shelves and being it was a clothing warehouse they would probably be in very good condition.
After making a call for directions we were talking with a liquidator on what was available. This was a 2 million square foot facility and they had thousands of shelves of all different sizes. We struck a deal and bought 30 six by eight foot shelves for $63.00 ea. They listed new for just over $500.00.
Shelves of this size are far too large for home type storage, but looking at them I came up with an idea to use one hanging from the ceiling in my garage.
I bought a four by six foot shelf from them for $50.00 and cut down the legs. I mounted it above my garage door and have enough material to make another. This one I am using to store the NOS fenders for my Nova instead of the roof of the car.
Mounted in this manner there is still enough room to put a garage door opener on the single door. I had to cut the legs shorter than I thought they would be due to the first panel of the door being kicked up as far as it is.
I am happy with how the project turned out and the cost involved. Units I was looking at that worked in the same manner were over $75.00 for a vinyl covered wire basket shelf.
I was also able to move the Nova and finish up the lighting in the single car stall, the lighting in the garage now is awesome. I have a few more things I want to finish up on in the garage (getting rid of junk), then I'll start looking more serious at either buying or building a rotisserie for the Nova.
After making a call for directions we were talking with a liquidator on what was available. This was a 2 million square foot facility and they had thousands of shelves of all different sizes. We struck a deal and bought 30 six by eight foot shelves for $63.00 ea. They listed new for just over $500.00.
Shelves of this size are far too large for home type storage, but looking at them I came up with an idea to use one hanging from the ceiling in my garage.
I bought a four by six foot shelf from them for $50.00 and cut down the legs. I mounted it above my garage door and have enough material to make another. This one I am using to store the NOS fenders for my Nova instead of the roof of the car.
Mounted in this manner there is still enough room to put a garage door opener on the single door. I had to cut the legs shorter than I thought they would be due to the first panel of the door being kicked up as far as it is.
I am happy with how the project turned out and the cost involved. Units I was looking at that worked in the same manner were over $75.00 for a vinyl covered wire basket shelf.
I was also able to move the Nova and finish up the lighting in the single car stall, the lighting in the garage now is awesome. I have a few more things I want to finish up on in the garage (getting rid of junk), then I'll start looking more serious at either buying or building a rotisserie for the Nova.
Monday, March 8, 2010
Old Snap-on
Since I bought my roll away in 89 I have always wanted a top box for it. When I was actually using the box in San Fran it would have been easy to justify buying one but I never did. After the side box was stolen in the move I started looking a bit harder for one.
My roll away is one of the smallest Snap-on makes, the closest one to it today retails for about 1,000.00. Unfortunately its cheaper than the top box which retails for around 1,200.00 and the middle box for around 700.00. So when I seen an add on Craigslist for an "older" Snap-on top and middle box for 250.00 I had to go take a look.
The gentleman that had them for sale was probably in his late 60's and they were buried in the corner of his garage. After looking them over a bit and a small amount of negotiation we loaded them in the back of my truck for 220.00.

My roll away is one of the smallest Snap-on makes, the closest one to it today retails for about 1,000.00. Unfortunately its cheaper than the top box which retails for around 1,200.00 and the middle box for around 700.00. So when I seen an add on Craigslist for an "older" Snap-on top and middle box for 250.00 I had to go take a look.
The gentleman that had them for sale was probably in his late 60's and they were buried in the corner of his garage. After looking them over a bit and a small amount of negotiation we loaded them in the back of my truck for 220.00.
The paint isn't perfect on them and there are a few dings, but the drawers work perfectly and he had the original matched keys for the locks.
I started to wonder if there was any collectors value to them being by the appearance of the logos they were "older" boxes so I did some searching on the internet.

There were actually very few sites that even cover old Snap-on boxes. From the small amount of time I spent looking it appears that the collectors value of them is minimal because most mechanics want large boxes and this was as big as it got for their time.
From what I did find these were made sometime between 1950 and 1953 and the same model was made up until the mid 90s. I can't be exact on the date because Snap-on was not consistent at using date codes on everything during this time period. Another reason there probably isn't a huge collectors market.
Regardless I am more than happy with the cost and the functionality of the boxes, now I am finding out just how expensive foam is to shadow the drawers.
Subscribe to:
Posts (Atom)