Monday, July 28, 2014

Engine Mods

 I have been trying to purchase a VMax throttle body for my car most of the winter. Early in June I was finally able to get one. They are sold on an exchange basis and basically you end up paying $150.00 for a CNC ported throttle body. I would recommend this to anyone with a DBW throttle body just for the improved throttle response alone. If it added any horsepower as claimed I wont ever know as I never had my car baselined.

The installation was stupid simple and literally only took 15 minutes.


During "Black Friday" of 2013 I purchased some PFADT headers for the corvette, apparently just before they went out of business. They sat boxed in the garage until the beginning of June when Matty and I finally installed them.  I did not take any pictures of us installing them but I found a good shot of them on the internet. They are works of art, the guys that assembled these are real craftsmen.

The "tri-y" design of the headers promotes more torque than standard 4 into 1 headers with a small compromise in top end horsepower.

Here is a shot of the old manifolds and cats we removed, I am not sure of the weight savings I would guess it to be in the 20lb range.

After both the throttle body and headers were installed I drove the car for a few weeks. The car was much louder, there were no CELs but it seemed to me to be running very rich. This didn't make any sense to me as all the modifications should have made it run more lean. I was able to make an appointment on July 7th to have it tuned at Mike Norris Motorsports.

On its first dyno pull I was expecting to see around 390hp, so I was less than happy to see it register 330hp. Mike got out of the car, stared at the screen for a few seconds and said "I am going to be a hero today". I did not understand right away what he meant because I was so focused on the HP figure I did not see the air/fuel ratio.

If you look at the dyno sheet the air/fuel spikes at 2200 and goes off the chart at 3200rpm.

After 20 minutes on the laptop Mike made the second pull which netted 413hp 410tq. He said he wanted to lean it just a bit more and on the third pull it made 415hp 414tq.

Here is a video Matty took of the third dyno pull:

Two days after the session I took it back to ORP, my previous best run was a 12.7@113 with a 1.9 60 foot, this improved to 12.2@117 with a 2.1 60 foot. I don't know if it was the extra power, my driving or track temp that slowed the 60 foot but with the current tires on the car launching it quickly is very difficult. I did not lower the pressures as I have in the past and that may have been the difference.

The car has a noticeable increase in power and sound. It currently has me satisfied but like any other mods it wont be long before the power level is comfortable and I will be looking for more.

Sunday, July 6, 2014

Corvette Headlights

The coating on my headlight lenses started flaking off last year. This year they have gotten much worse and have started to look very bad. Unfortunately the headlamp housings are over $1100.00 each and if you want to bake the housings and separate the lenses you can purchase new ones for $155.00-200.00 each.

I have had fairly good luck with polishing these types of lenses in the past, the only problem is the UV coating is removed and the lens yellows rather quickly.

Here are some shots of the scratches and failed coating on the lenses.

In reading some of the information on the net by people that recondition headlamp lenses for a living I came across a thread in which someone had determined that spar varnish (which contains UV blockers) could be used as a protective coating on headlamp lenses. There are companies that sell UV coatings for this application, many I could not find any information on such as anyone that had successfully used them the ones that had been used were selling for $90.00 for four ounces. I still had much of the correct polishing equipment and the varnish is very cheap so I decided to give it a try.

Most of the people doing this tape off the surrounding areas of the headlamp housings and polish them in place. I was not comfortable with this technique and decided to completely remove them. This required some dis assembly of the car which took less than an hour.


The other thing I had read was the old coating need not be fully removed. I tried this to begin with but the lens looked very hazy where the old coating was compared to the areas that it was completely removed. I decided to remove all the coating which required going to a very heavy grit paper. Because the coating is very hard I had to start with 320 grit paper, even this grit made the hard coat difficult to remove.


 After using 320 to remove the hard coat I then used 500 and 800, this was taken after I was finished with the 800.


After the 800 I used 1000, 1500, 2000 and 3000 then mirror glaze, this shot was taken after the mirror glaze .


The last step which I did not take pictures of was mixing the Minwax Helmsman Spar Urethane Clear 50/50 with mineral spirits. I then wiped the lens down with mineral spirits and used a foam brush to put on a coat of the 50/50 mixture.

In the sun the lights dried quickly and I was able to reinstall them 30 minutes after I had coated them.


The thread I read about doing this on was started early in 2008 and is still and active thread. Many of the people using this technique had documented it lasting two years or more on vehicles that spend all their time outside. Even if it only lasts that long for less than $30.00 and a few hours on a Saturday I would do it all over again.

Monday, May 26, 2014

Air Lines

Two years ago I was trying to decide what material type to use for the air lines in the garage. Two weeks ago I was still undecided but determined to do something over Memorial Day weekend. The temporary setup I had was not working with 75 feet of 3/8” air hose my high speed grinder was a low speed noise maker. Because of the humidity here I decided on ¾” black pipe, hoping it would help condense the water better than PEX or copper lines.


I had been hesitant to use black pipe because of the mounting options, but I am happy with how it came out. The only thing I have left is the drip leg by the stairs, I am not finished with the drain side of it. I may use some PEX to move it off the stairs.


Monday, May 5, 2014

Garage Stereo II

Two years ago I bought a Kenwood receiver and a couple of Aiwa speakers for $20 dollars at a garage sale. Along with the computer in my garage these were the basis of the stereo. Shortly after buying them, the neighbors across the street had some Klipsch KG 4.2's for $60 for the pair. Apparently they were a little to much for the Kenwood receiver, they sounded horrible, so I disconnected them and put them on the other side of the garage.

Over the last few months the Kenwood has started showing signs of failing, the volume mostly fading in and out and I started looking for a cheap receiver to replace it with. Not having many garage sales during the winter limited my searching to CL, pawn shops and Goodwill.  I did not have any luck with any of them so I started looking on Ebay and found a nice Denon AVR-1602 for $45 shipped. It is 70 watts per channel into 8 ohms <.08 THD. The tuner is much better than the Kenwood and the Klipsch speakers sound great.


Sunday, May 4, 2014

Kitchen Project

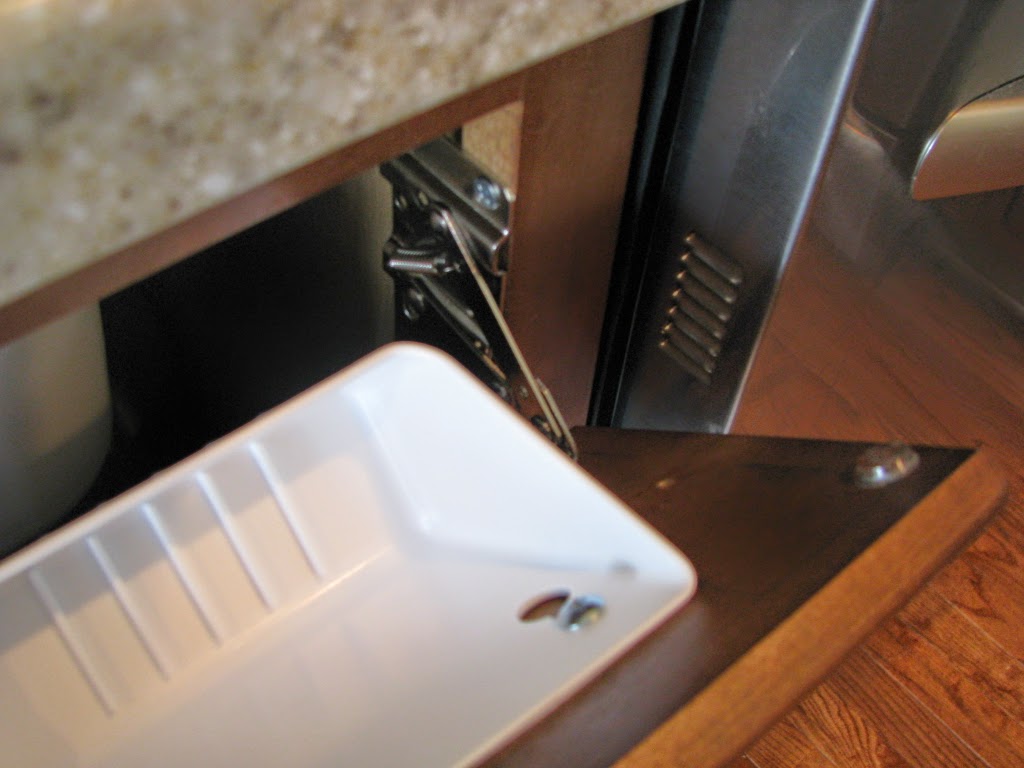
I did a small project for Tania today in the kitchen. It was a kit by Rev-A-Shelf, that puts tip out trays behind the filler panels below the sink.


The kit was well made and comes with a template making the install very easy. It uses some trick hinges at the ends and took all of 20-30 minutes to install.


Lawn Striper

When we lived here before we had a Simplicity walk behind with a striping kit, Tania liked using it and putting different designs in the lawn. When we moved back none of the mowers we looked at had this feature and only a couple as an option. Aftermarket kits are as much as $250 and the internet is filled with homemade options such as chains, brushes and wobble wheels, this weekend I built my own based on PVC.

I purchased a couple of 1.5" diameter wheels on Ebay and pressed them into these 1.5" to 3" pipes.


The outer diameter of these fit perfectly inside a 4" pipe. I cut a length 48" wide inserted one of the "bearings" and filled the pipe with sand before installing the other end and putting a 3/8" axle through the center. I connected the axle to some flat strap and welded it to a section of "L" angle which I kept as close to the pipe as possible to scrape off wet grass.


I then connected everything at a pivot point to brackets I made and bolted to the bottom of the hydros.


The roller weighs around 40lbs and I can add more weight easily if necessary. We used it this weekend and Tania said she can see a difference It is not as drastic as I had hoped. I think though that it may depend on temperature and condition of the lawn. Currently our lawn is maybe a C+ and our old lawn was an easy A. I will play with it as the summer progresses, if I cannot get the way I want I am only out $30. I think though that a lawn on a 90 degree day is going to lay over different than a lawn on a 58 degree day, Ill know soon enough.

Sunday, April 27, 2014

Garage Fans

Late last summer I bought some fans from HD. At the time I purchased them it was too hot to mess with running wires in the attic for them. As summer turned into fall I got very busy with work and I even at one point forgot I had purchased the fans. I ran across the box a few weeks ago and decided to get them installed.

Originally I had not planned on installing ceiling fans but the price on these was so good, around $57.00 if I remember right, I decided on them versus using box fans. They have a nice industrial look, no lighting and are fairly quiet.


I initially was going to do a quick and easy jumper from the garage door outlets and just use the pull strings on the fans to control them. That plan quickly went away when I found out the fans had no pull string controls. Instead they came with these huge controllers apparently left over from 1974, that allow them to be set to five different speeds.


This of course required a new circuit, drops through insulated walls and multiple trips in and out of the attic. At least the temperatures this weekend were mild and I got some help from Matty. I am happy with how they turned out, I was also pleasantly surprised by the quality of the fans and the total lack of plastic. Hopefully they will be useful this summer when it gets hot and humid.


Friday, April 11, 2014

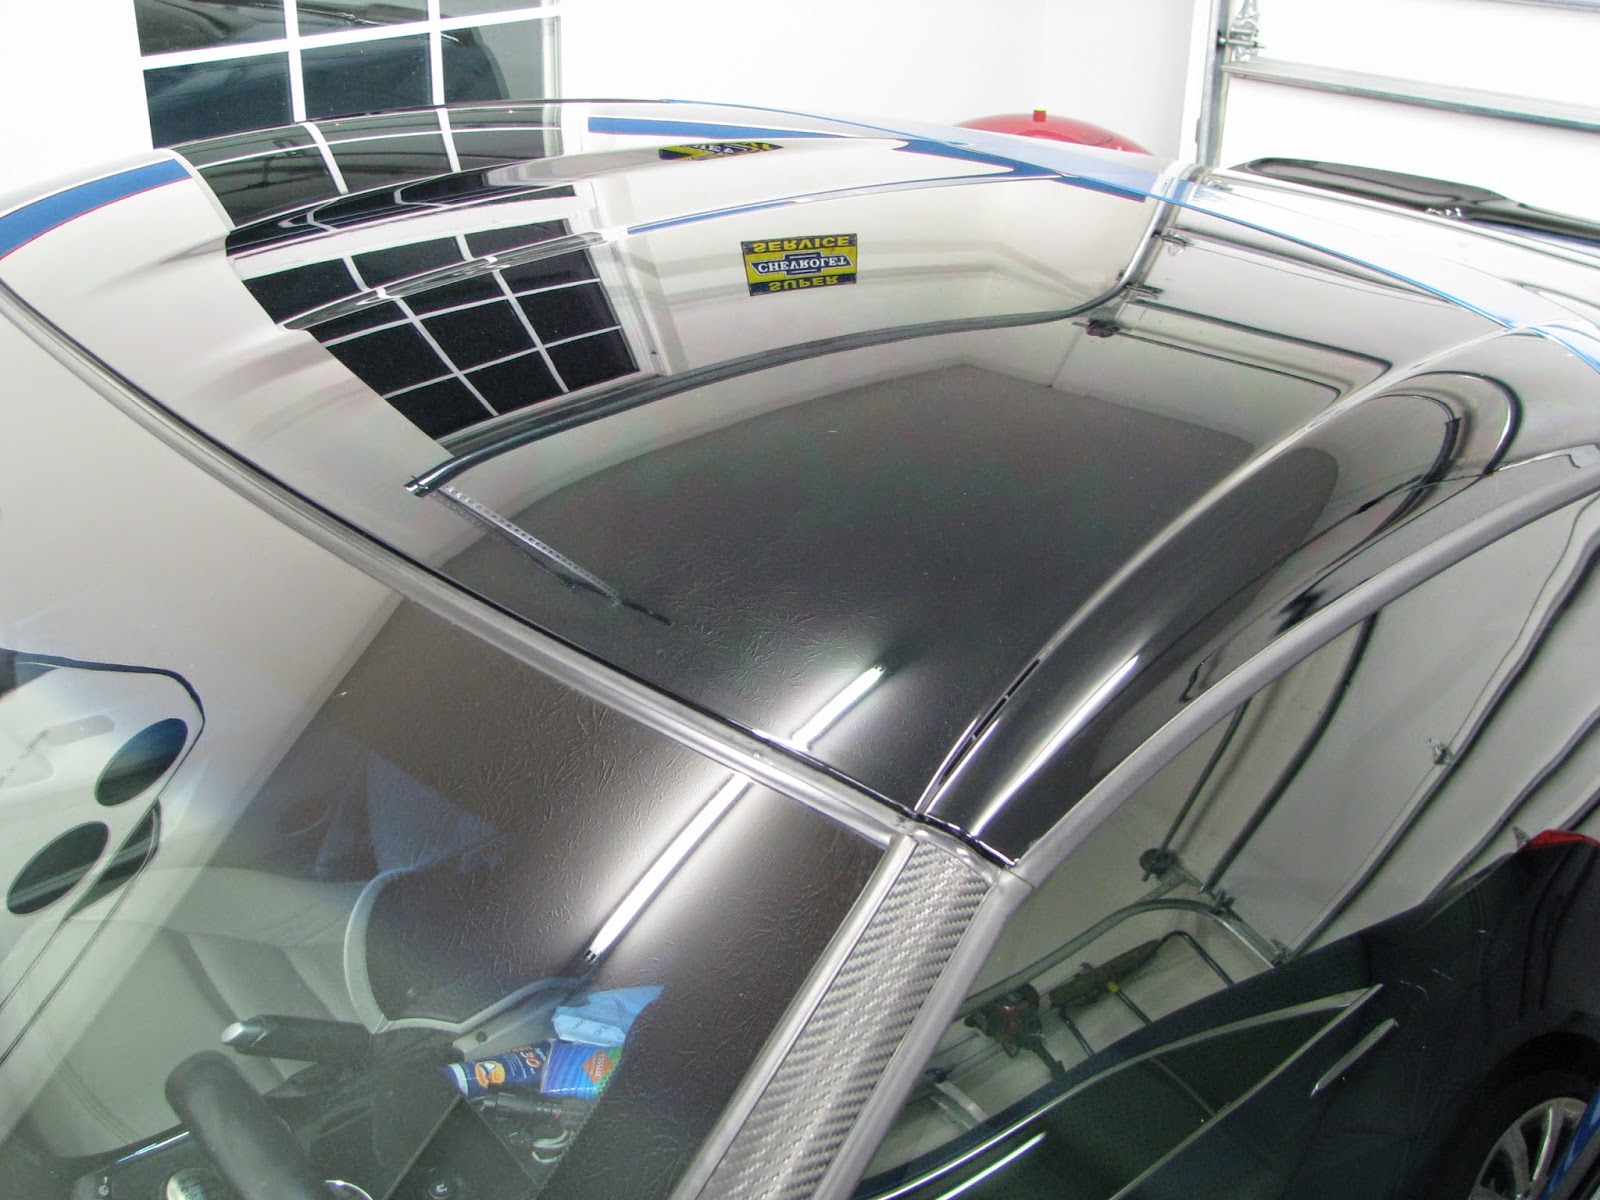
Glass Top

Wednesday night I was looking through Craigslist adds when I came across a "new glass top" for a C6 corvette.

All day Thursday I debated the pros and cons of owning one and finally that evening I decided to give the guy a call.

Apparently he had bought the top last fall, hurt his back, sold his corvette and the top had never been used. After putting it on my car and looking it over we struck an easy price which was about 50% off the retail cost of the top with a carrying bag.

It looks like a top that came off a black car, or a top that is painted black.


Its dark enough that its hard to see in the car through it.


Looking out from the inside its a nice shade of blue simmilar to the shading at the top of the windshield.


Tuesday, February 25, 2014

Tania's New Ride

After two years of looking and test driving around 15 different vehicles, Tania decided on a car.


The GXP had 140K+ miles on it and after us spending 4K in transmission repairs over the last nine months we decided it was time. If GM still made the Grand Prix GXP we would have bought another in a heartbeat.

We were able to get the dealership to bring ATS in from quite a distance away that had the options we wanted. The only real issue with the car is, the base is around 37k and then Cadillac has around 15K in available options. The way they are packaged together makes it very difficult to get the options you want without just buying them all. Probably the hardest compromise she made was on the HUD, basically its part of a sub 5k options package.

This is a 2.0L Turbo AWD with an intermediate number of options.


The 2.0L Turbo is rated at 272 hp and 260 ft/lb torque, this is at up to 20 psi of boost. This makes the car capable of sub six second 0-60, low 14's in the quarter and up to 30mpg. The car has nearly 50-50 weight distribution, Brembo brakes and 20" wheels.

Its performance is better than the GXP, and is considered to be equal to or better than the 3 series BMW. Will have the next eight years or so to decide if its a good car.

Sunday, February 23, 2014

Snow Anyone?

Our family got through the first few weeks of snow and winter as we had for many years with standard fare snow shovels and hoping the plow didn't bury the end of the driveway.

The difference with this winter is we were going to set a record for the heaviest snowfall recorded. I did not realize that they started keeping records for this area just after the civil war. Regardless we had over 51 inches of snow this winter and probably had records related to cold etc. Not anything that didn't happen over a majority of the United States.

Once it started snowing a lot we were in denial and after one of our shovels broke we stopped at the local ACE and picked up a "Snow Sleigh".


This thing actually works awesome and is great for digging out the end of the driveway when the plow buries it. You never lift the snow just fill it up and slide it over the drift and dump. The only issue with it is its still a manual shovel.

Just before the heaviest snow of the year we were back at ACE, when we had purchased the shovel they had a Craftsman blower on sale fairly cheap and we decided we were going to take the plunge and get one. At that time we had gotten around 25" of snow for the year.

When we arrived they had picked up a shipment of snow blowers, both Craftsman and Toro. Having read the reviews on the single stage Toro's and how poor the joystick shoot handle on the Craftsman was we went with the Toro.


Thinking that now that we have bought one it will stop snowing was a big mistake as the following day I was thick in it. 

Two weeks later on my birthday this was the scene.


The Carhardts Tania bought me for Christmas got a big workout this winter, I ended up wearing them to and from work many days.

I was very impressed by how well this snow blower worked, anything that fit in the front of it, it would shoot 15'-20' with no problem. The only thing it did not like was slushy snow, it would still handle it just not as well.

This isn't a very good picture but it shows how deep this would go with a single pass through this drift. The snowfall total for this storm was 6.8".


 Two weeks after this there was at least another foot around the edges of the drive.