Sunday, May 3, 2020

Drill Press Part 5

I contacted a a bunch of different parts distributors trying to find the resilient rings to mount the motor with. What I did find out was the Marathon motor was originally sold to be used in an assembly for some type of HVAC equipment and didn't have a standard catalogue number that could be used to determine what rings were on it or if they were proprietary to the installation. After wasting a massive amount of time trying to find the correct resilient rings and purchasing two sets that were "the right ones", I used the last set I purchased to center the motor on the mount. I made some brackets, welded the case to the mount and cut the ends off that attached to the resilient rings. Yesterday I finished up the wiring and mounted a light I purchased off Amazon. I'm very impressed with the build quality and brightness of the light for its cost, its also a very nice 5 to 6k color. I will definitely buy a couple more.


The press is useable now but I have two more things I want to do with it. I need to purchase a new belt for it and either make or purchase a down stop.

Thursday, April 16, 2020

Drill Press Part 4

I spent some time since last weekend searching for machine knobs. I found some on Amazon but the delivery dates on them were at best in May. I ended up finding some nice textured ones at Grainger for less than $2.00ea.

I had an hour tonight to get the rods threaded and install them.


Tomorrow I'm contacting a Marathon distributor to see if I can figure out the resilient rings on the motor.

Sunday, April 12, 2020

Drill Press Part 3

Today I spent the better part of the day trying to bead blast the wheels for my corvette. The factory paint on them wasn't done very well and one has some minor curb rash so I thought I would repaint them. Unfortunately only blaster I have available to me large enough to put them in had plastic media and while it would remove the paint I estimate it would have taken me 3+ hours a wheel.

Because I wasted the better part of the day with that, I didn't get much done on my drill press.

I did get the quill spring cleaned, painted and installed, along with the motor plate which I some how forgot completely about when I blasted all the other parts. The plastic beads worked ok on it, I just need to paint it now.


I also got some quill handles made, this is one part I'm confused about. Every photo I have seen of this model has a quill handle that bolts to the end of the pinion. My pinion has a hole that is about 1/4" that is not very deep and not threaded, so I'm not very sure how the original handles attached. Anyway I made some from 1/2" rod and threaded them into a sleeve at a 18° angle. Now I just need to find something to use for knobs. I found an old umbrella handle but I don't really want to wait till I break two more.


Saturday, April 11, 2020

Drill Press Part 2

Last weekend I borrowed my buddies blast cabinet and cleaned up most of the drill press castings. Wednesday it was warm enough here to paint what I had blasted.

The biggest pain was cleaning the support column, the rust on it was fairly thick but fortunately it didn't pit the metal.


I got about 70% of it put back together today.


I still have some details to figure out. It didn't have any quill feed handles or a depth stop, I think I can make both. The thing that has me a bit baffled right now is the motor mounts. It has a Marathon 1/2 horse motor with resilient ring mounts, the mounts are shot and I have no idea how to remove them from the end plates on the motor or what to buy to replace them. I have had zero luck matching the data plate to anything I can find online. I did find a major supplier for Marathon motors, I'm going to call them next week and see if I can get more information or what replacement rings to buy.

Saturday, March 28, 2020

Drill Press Part 1

Picked up a new project today off of Craigslist, a Walker Turner 1200. From what information I can find it was built around 1948-1949.


The good:
  • It was cheap.
  • The bearings feel good with no play.
  • It runs
  • It has a nice large base
  • The table is relatively undamaged


The bad:
  • No low speed
  • The belt cover is missing
  • The quill handles are missing
  • The depth stop is missing


I have it mostly apart now and plan not to fully restore it but make it functionally sound as possible. Its my first drill press and I don't know much about them so it should be fun

Monday, March 2, 2020

Saw Stand

I got this nice table for my cold saw two weeks ago for free. Its standard height but has casters welded on it. For now I'm going to leave them on because I need it to be portable, when I get into a place that is larger Ill set it on the floor.


Sunday, March 1, 2020

Welding Cart Part 3

Over the last few weekends I finished the welding cart that was becoming a science project.

After I started painting the drawers, I decided I didn't like the look of the drawer pulls with them being curved out and rounded on the edges. There wasn't enough material to to square them off so I made some new ones from 7075 extrusion.


For the same reasons I decided to make a squared off handle for the cart, my intent was to match the angles of the handles on the welder.


This weekend I took the cart apart, finished some welds I couldn't get to with it assembled, prepped it for painting and hauled everything downstairs to paint it. It was 54° today but not warm enough to paint in the garage or outside.


Today the paint was dry but was still fairly soft, I spent about 45 minutes going over it with a head gun, hauled everything back out to the garage and started reassembly.


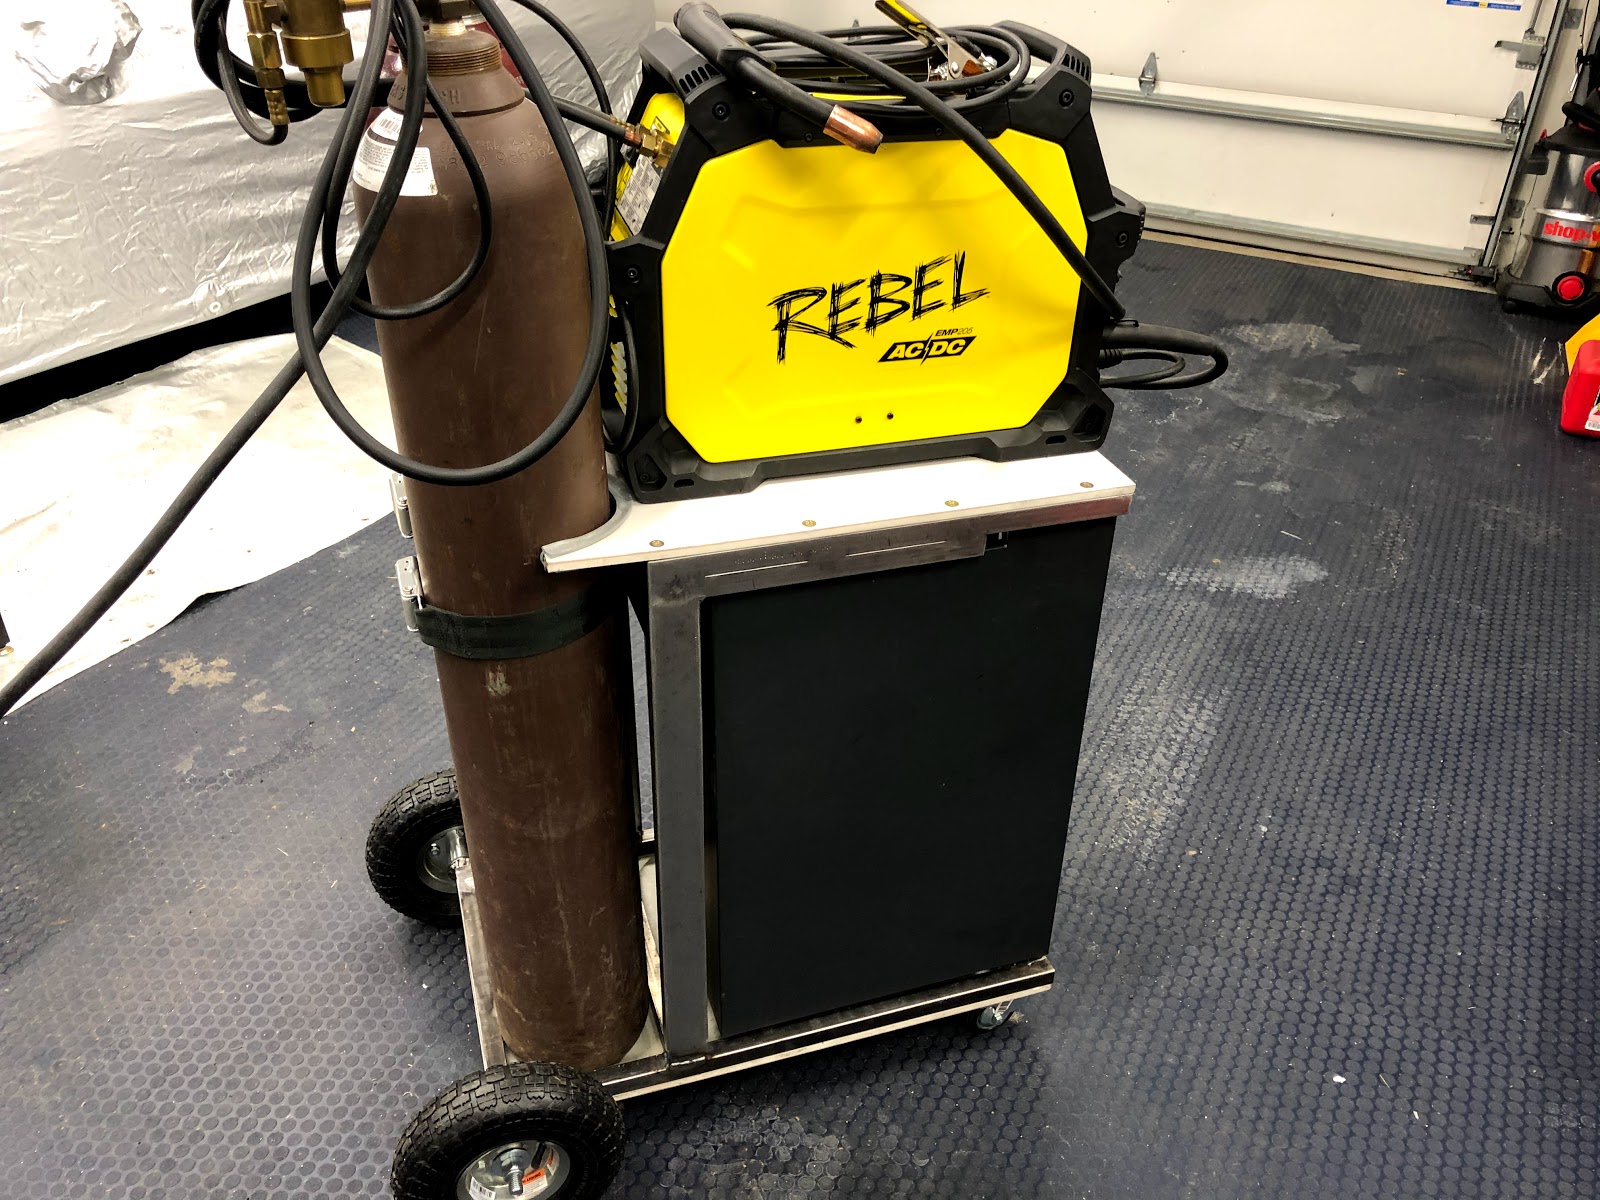
The last pictures are of it fully assembled and finished... maybe. I may make a hanger for the ground cable, I haven't decided yet. I prefer having the mig gun make a big loop over the welder versus trying to coil it up on the side and I'm not sure I want any cable management brackets sticking out from the sides.

I'm very happy with how it turned out and while I only have just over a $100.00 invested I wont do another project like that. The amount of time I spent with cutting up the clothing rack, grinding old welds and splicing pieces to make them long enough far outweighed just buying new material. The metal from the clothing rack would have been useful, just not for this project, it seemed like every piece I had was one inch too short or had three holes that needed to be filled.


Sunday, February 9, 2020

Welding Cart Part 2

The cold weather has been poor motivation for working on my welding cart.

This weekend I got the upper frame made and attached to the base. I mounted the floorboard to the upper frame and cut it to fit the bottles.


I used some 1/2" strap to fab brackets to hold the seat belt extension.


I haven't decided what I am going to do yet for cable management, probably something simple. Once that is done I can takeit all apart and start painting everything.