Sunday, December 16, 2012

Dry Cut Saw

I have been watching CL a while now for a abrasive chop saw. Last weekend I came across a new listing for a 14" Milwaukee dry cut saw, "barely used" for $200.00.


I only know a small bit about dry or cold cut saws and would normally research more before buying but this seemed like a deal I needed to jump on. It appears that the owner did not properly clamp whatever he was cutting. The blade was deflected into the edge of the throat causing only minor damage to the base.

Unfortunately the blade did not fare as well, initially I thought it was only a couple of broken teeth so I tried to remove it and found the outer flange had rotated on the spindle shaft


After fighting with it for over an hour I was able to get the flange off the spindle shaft. The damage was limited to the outer flange which I was able to order for less than $3.00.


The blade had damage to over 1/3 of the teeth, at $5.00 a tooth to replace I started looking for a new one. Because I didn't research this in advance I had no idea that ferrous dry cut blades were that expensive. The cheapest I could find a Milwaukee blade was in the $150 range with most other brands being $80 - $100. Even with buying a new blade the total cost would still be less than buying a new saw but more than I had planned on investing.

This week I debated selling the saw as is and looking again for a abrasive chop saw when I found a HD link selling the original blade for $35.97ea. Needless to say I selected 2 and blasted through the checkout pages.

Sunday, October 21, 2012

Staycation

I took a staycation this week, Matty was off on fall break and I had a lot of time built up. The week started with Tania waking me up at 6:30 Monday morning to tell me her car was broken. Long story short a diode went out in her alternator taking the battery out with it. Not wanting to spend $150.00 on a tension unloader and not being able to rent one didn't help with the repairs. The alternator was non stock and the battery was Delco which took me two hours at the dealership to warranty, this meant my staycation started on Wednesday.

Last week I ordered a heads up display for the corvette, it is something I have wanted to put in it since I got it. My intent was to start putting it in Monday morning, but started it on Wednesday, The unit I ordered came as a kit with the HUD unit, control panel, bezel and wiring harness. All of the parts are GM except the harness. My corvette is a 2LT trim package, the HUD was part of a 3LT trim package that included memory heated seats and mirrors, 6 disk CD changer and a telescopic steering wheel. Nice stuff but not worth the $3,000.00 price tag. The HUD kit I purchased was $400.00 shipped.

This upgrade is very common for corvette owners, except most of them will cut the ducting to the driver side register to get the HUD unit in the dash. Once it is installed they tape it up with duct tape, which saves hours on the installation. Because I had plenty of time and didn't want to cut the duct I did it the hard way and removed the dash. Just above the steering column you can see the HUD between two ducts the top duct is the one that gets cut in two places for the easy install.


To get that far I had to remove all this stuff....

The install took me about 8 hours total, I was in no hurry and I chose to solder the harness into the factory harness. The kit comes with wire tap connectors which are garbage for reliability. Matty was the official soldering iron holder and helped me finish up the installation.

I took a few pictures of the HUD, its next to impossible to take a clear picture of it but it is quite clear to the naked eye. It has multiple modes and can be configured in different ways, the pictures I took were of the three basic modes.

This is the standard street mode that will display blinkers, radio stations, fuel status etc. It can also be configured with one of two tachometers.
The next two are "Track 1" and "Track 2" they are basically the same, the only real difference being the way the tachometer is displayed. What is visible with these two and not on the street mode is the "G-Meter" across the bottom which reads lateral G's.


Friday I had contractors over as a follow up to our one year walk through of the house. They fixed a couple areas that were squeaking on the hardwood floor and quite a bit of sheet rock work. That occupied most of my day and lead to Saturday being paint day for Tania and I. Tomorrow, weather permitting I am going to take another try at getting some of the vinyl stripes off Matty's car. Then it will be back to work where I will start to think about when I can take a vacation.

Monday, October 1, 2012

Braided Steel Brake Lines

Today I swapped out the rubber flex lines for braided steel lines on the Corvette, The braided lines will not expand like the rubber ones do which makes the brake pedal much firmer and provides better feedback.

Because the car does have over 30k on it now the cast aluminum suspension pieces and the cradles have a lot of road grime on them. I decided to clean them up while I had the wheels off the car. Napa sells a product called "Aluminum Brightener" it contains hydrofluoric, sulfuric and phosphoric acids. With all that bad stuff you know it works great.

Before:

After, I never touched the aluminum parts only wiped down the plastic with an old wash mitt, I spent maybe five minutes cleaning this area.

The rear suspension was much dirtier, this picture is after I sprayed it once and let it set for 30 seconds.

Finished about five minutes later.

Sunday, September 30, 2012

Mural Pt 3

Yesterday I finished my wall mural, I added some shading, a emblem, license plate frame and the Corvette script.


 I have been searching for some other posters or banners to put up, most of what I have found was either smaller than I wanted, over $100.00 or was way too expensive for shipping. Saturday I decided to give Walgreen poster service a try, for $30.00 they will print a non copy-write picture at 24"x36". I have been working on modifying a picture I took a few weeks ago, I uploaded it and 30 minutes later I got an email informing me it was ready.


 The camera picked up some reflection off the plexiglass covering the print, the quality of the print was quite good.


Friday, September 21, 2012

First Snow

Tonight we had our first snowfall of the year or a really bad hail storm, who can tell in Indiana.

This is a shot of the street to the side of our house, it was flooded completely across within 5 minutes.

This is a shot out the back after the 60mph winds tossed all of our rather heavy aluminum lawn furniture.

Here is some drifting along the side of the house. Four hours later its still raining and most of the drifts are still there many in the streets.

Wednesday, September 19, 2012

Matty's First Car

Last Saturday Tania and I were able to find Matty his first car. I had searched on CL for a few weeks and decided on a budget more than the vehicle type. Matty wanted a Miata which met one of my criteria points of being reasonably safe, the problem being most were well over double what I had decided for a budget. Friday night I found one that was close and with the intent of some negotiation we set up an appointment to look at it. Before we left the house I called on two other cars and had numbers for an additional four.

During the hour long drive to meet the Miata owner I decided to do a local dealer search on my phone and found a 2005 Cavalier listed for 3k which I called to verify it was still available. I had not seen anything near that new at that price level through private individuals or dealers. My intent was to find a dealer that might have two or three vehicles that met some of my criteria.

We met the Miata owner and looked over the car, it was a 92 with 134k and a brand new paint job. The paint on it was white and a fair paint job, the wheels were spray bombed black and overall the car looked very good for being 20 years old. I drove the car and it had few rattles, was amazingly gutless, handled nice for its age and had horribly hard seats. The owner was asking 4k and was willing to negotiate, I told him I had other cars to look at and we left.

We then drove to the dealer with the Cavalier and after asking about it the first thing they told me was "you do know this is a manual transmission". That being what Matty wanted and being an obvious problem for them was a good negotiation point. The car itself has 137k miles, new tires and brakes, air-conditioning, AM/FM/CD, Tilt Steering, Remote Trunk Opener, fold down rear seats and some exterior package I have not been able to identify which included Rally Stripes and a factory rear wing.

After a 15 minute test drive and some opening negotiations we ended up leaving the sales person in the showroom and were seated at the owners desk. Through the process of apparently "stealing food from the mouths of my children" I was able to negotiate an out the door price of 2800 which included tax and license fees.

The reward for my satisfying negotiation was a bright orange check engine light illuminating 10 seconds after pulling off the lot. I drove it over to an auto parts store and the code was a P0141 aft 02 sensor. It was a fairly painless replacement and despite the mileage on the car it runs very strong. The only true problems with it are of a cosmetic nature. The car is from Georgia and has some UV damage which compounds the normal UV damage that most Cavaliers have. The plastic trim at the base of the windshield as well as the bezel around the gauges are both broken and cracked. I have plans for repairing them. Another area of UV damage is to the rally stripes which are made of vinyl and have split and cracked. For now I will just remove them and then decide later with Matty if we want to replace them.

The last area was the headlamps which were damaged worse than I have ever seen. After burning up three sheets of 120 grit DA paper on the driver side headlamp I decided to try and fill in the remaining cracks with lacquer thinner. This worked well and I was able to work up through the grits until I polished them clear again. These before pictures were taken after the dealership had washed the car, we removed the light housings and washed them.


Matty wont be able to drive solo until December, so I plan on driving the car off and on over the next few months to make sure there are no problems with it. It should be very economical to operate and the parts are very cheap for it, the headlamp housings new are less than $50.00 for the pair, fixing them was more about showing Matty that not everything needs to be thrown away and replaced with new.


Sunday, September 9, 2012

Mural Pt 2

I had some progress on my wall art this afternoon. I ended up just using the 1 foot by 1 foot grid and free handed most of the drawing and paint. There was no way to really tape line anything and the one line I did tape ended up pulling most of the base paint from the wall. Its not an exact duplicate of the picture and was never intended to be, I don't have the artistic talent for that.

I am happy with how it has turned out, I still need to add the emblem which I may either use a real one or a decal. I want to find a frame for the plate and have some shading I want to add left of the bottom and to a couple other areas. I may also add the Corvette script to the lower right bumper area, it was washed out when I converted the picture.


Monday, September 3, 2012

Mural

Since I painted the walls in the garage I have been slowing putting up banners, pictures etc. One wall I have been saving for something big but too cheap to spend the money on something big to put on it. I have been looking at sites online that will make vinyl from a photo, both photo realistic or a black line drawing. The prices for them are not terrible until you get into the larger ones like I was looking at.

Instead I decided I would try and transfer a photo by using a grid. I am not what I would consider to be an artistic person so I figured if it doesn't turn out its as simple as painting over it and I'm only out my time.

First I chose to use this picture as a basis for the wall.


I then used GIMP to make the photos perspective straight, desaturate it and turn it into a drawing. After that was done, using the license plate as a known size reference I laid out a one foot grid then broke it down to inches.


I then laid out a grid on the wall and began drawing a rough outline of the picture.


This is all the further I got with it today, once it is drawn in I plan to paint it black as in the second picture and depending on how it turns out I may do something with the emblem either actual colors or a real emblem.

Sunday, August 26, 2012

Garage Lighting Finished

Yesterday I chose to buy a couple more four foot lights and finish the install.

I ended up with 10ea four foot and 1ea eight foot lights.

I think it will be enough.

Sunday, August 19, 2012

Garage Lighting

Last weekend I purchased some T5HO lights from Home Depot but only had time to remove the existing 32 watt T8 lights and replace them along with putting one 8 foot long fixture above my work bench. This weekend after seeing how the existing light circuit was wired and the current loading on it I did not feel comfortable adding all the other lights I had bought. I decided to wire in another 15 amp circuit for the additional lights, an added benefit to this would be that I could split how many lights were on at one time.

The pictures I have taken are with just over half the lights installed, I still have three more four foot lights and one eight foot light to install in the other two bays. Looking back in my blog you can see many of the pictures I took were with the lights on and the door open the difference with the new lights is quite drastic. Taking a picture of them does them no justice, the auto exposure dims the camera and disabling it only produces a washed out picture.

The T5HO bulbs are 5000 Lumen per bulb compared with the T8 lights I removed which are 2800 Lumen per bulb.

With the camera directed more towards the car, it gives a better indication of how bright the lighting is.

Monday, July 30, 2012

GRAND-AM at Indy

In February I was watching the 24 hours of Daytona when they advertized that they were going to race in Indy this year and as a promotion to that they were selling tickets for $24.00. I have always wanted to go to a big sports car race and at that price it was a no brainer. What I didn't know till the day before the race was they were good for the entire day and you basically can go anywhere you want, pits, seating etc.

I went with a buddy from work and we arrived at the speedway just after 1pm which was the start time for the Continental Tire Sports Car Challenge. We pulled into a parking lot directly across from the main straight and the lady collecting money asked me to park my car right next to her. I never got an explanation but I wasn't going to complain about the great parking spot.

The Continental Tire Sports Car Challenge was a good race only hampered by a 25 minute or so red flag for standing water about 40 minutes before the end of the 2.5 hour race.

The GRAND-AM race started under a green/yellow flag due to the rain picking up again. The day was perfect the temperature was great and it hadn't rained here in months. During the GRAND-AM race it flared up two or three times with very heavy rain then the sun would come out bright and dry the main track in a matter of a few minutes leaving the road course with standing water.

We chose seats at the end of the pit out which was the start of the braking area for turn one. This enforced for me why I very seldom go to IMS to watch a race. I am sure there are good seats there and much better than we had but every time I have been there I have had nothing but poles, fences, stands, screens and banners blocking the view. I do plan to go again next year and try to get a spot on the infield area, from watching the race later on TV it looks to be much more open.

Here is a picture of where we were sitting we moved once after we realized the screen hanging from the box seats above us was blocking half the track in the distance, you can see it in this picture on the upper left hand area. The red square I put on the picture is the area I took a lot of my pictures from, Its hard to judge distance but I would guess it to be a good 300 yards from where we were sitting.


Here is a shot from that area of the DP Corvettes, they were absolutely beautiful and sounded incredible.


Here is the ZL1 pace car that started the race.


Here is the ZL1 pace car that ended the race.


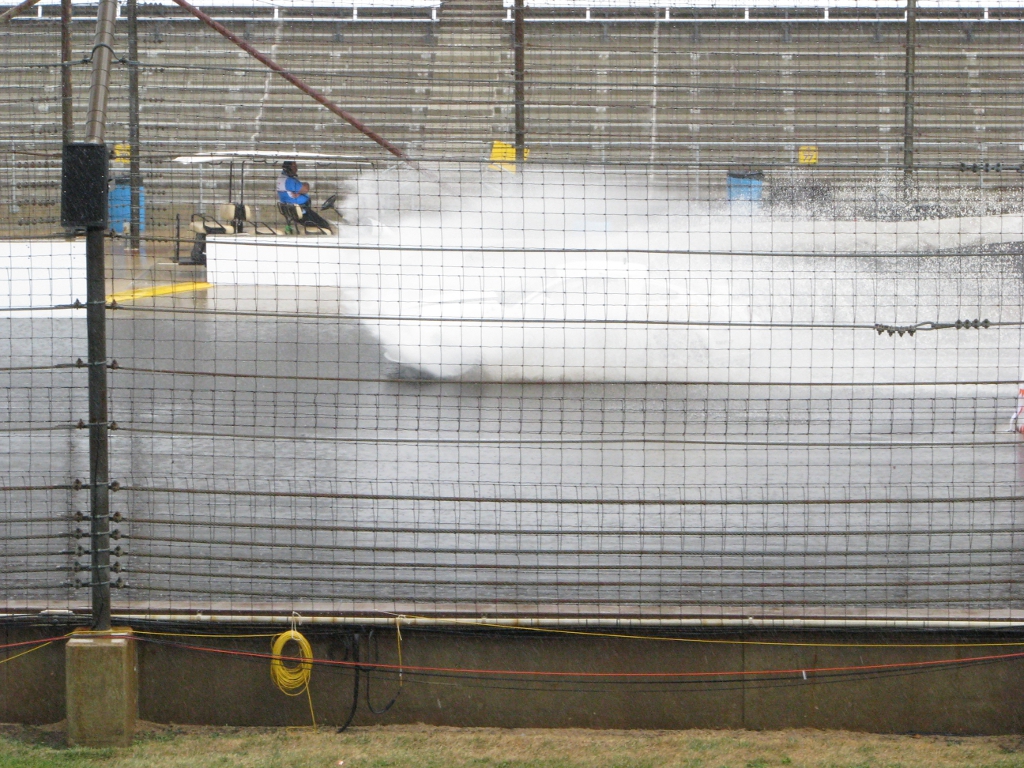
Unfortunately the team I tend to root for the SDR Motorsports #90 wrecked between the third and fourth turns on the first lap. Antonio Garcia was being far too aggressive that early in the race with the wet conditions. There was a ton of action during the race with the track being soaked on three separate occasions, the cars were in and out numerous times to switch between slicks and rain tires. At one point the pit out area directly across from us was a lake as you can see in the picture below.


This brought cheers from the fans as each car exiting completely soaked the track workers who you cannot even see in the picture. Eventually the pit out flagman moved to the other side of the retaining wall between the track and the pit out lane.

  
The last hour of the race brought a lot of controversy from the #02 car fielded by CGR and driven by Scott Dixon and Juan "Im only famous for running into a jet dryer" Montoya. The #01 car last years championship winner fielded by CGR is again in the running but was in third place in the standings. Coincidentally Montoya managed to take out the #09 Action Express Racing corvette of Joao Barbosa and the #08 Starworks Motorsports entry driven by Ryan Dalziel. Both cars were ahead of CGR in the standings and both were contenders to win the race. It seems though that the need to have CGR in the series outweighs any repercussions for his driving.

Here is a shot of Montoya just moments before spinning out the 09.


I am looking forward to going again next year somewhere in the infield, maybe I'll join a corvette club and do the corral thing.

Sunday, July 1, 2012

Fender Bender

Tania had a small fender bender at work this week. She hit a concrete pillar with the front passenger fender while she was backing out of a parking spot at work. Fortunately she wasn't hurt, just mad.

There is a small dent in the fender radius and some of the scrapes went to the bare metal. I worked on it some today and was able to get the majority of the scratches out of it with some 600 grit working up to 2000 grit pad. Because of where the dent is I think it would end up worse than it looks now if I tried to take it out. I haven't decided if I am going to leave it as is or get some paint and try and fix it completely.


I also finished up a project I started earlier in the week. I bought a magnification light at a garage sale a few weeks ago for 2.00. The lamp did not work and the pivot pin out of the cast metal base was broken. The lamp was a new bulb and some contact cleaner in the switch. For the base I welded some strap around the cast housing along with a 5/8" steel rod as a new pin. It pivots on a piece of polished steel that I found at the junk yard years ago, I think it was designed to be a union for fluid lines. I cleaned it up and knocked out some of the dents that were in it, tightened up all the loose hardware and polished the lens. I'm happy with how it turned out and will probably end up using it quite a bit.


I spent the rest of the afternoon removing all the wheels from the corvette, cleaning all the wheel barrels and putting a good coat of wax on them. Its amazing how much tar and rocks were stuck to the front ones. In the back I can reach through the spokes and around the brake rotor to easily wipe them down when I wash the car. The front wheels are one inch in diameter smaller and the brakes are three inches in diameter bigger which makes it next to impossible to get my hand past. I am hoping the wax will keep most of the tar from sticking or it will come off easily with water. No one but me probably notices it.....

Sunday, June 17, 2012

Garage Stereo

Two weeks ago I was driving back from Lowes when I saw a sign for a garage sale, it was in a division just off of ours that is much older. Usually that will mean people have lived there longer and had more time to collect stuff. The house had stuff all over the lawn and the driveway along with a slightly pissed off woman who's husband was not around to "help sell his junk". This enabled me to get three oak kitchen lower cabinets for $20.00 which I plan to use in the laundry room to make an area to fold clothes. A Hon 5 drawer vertical file cabinet for $20.00 and a Kenwood reciever, two Aiwa speakers, a subwoofer and a magnification light for another $20.00.

The garage stereo sounds great now.


I also purchased a ceiling fan for the living room. I had been looking at different ones online but was concerned that the standard 54" fan would not look good in a room that big.  Lowes had a 60" Hunter on sale and I was so impressed with how it was built and its looks I went back and bought another for our bedroom.


This weekend I spend working on the Corvette again. The passenger door has never fit properly and I had never taken the time to look at it. By loosening the hinges I was able to rotate the bottom of the door inward and taking the door panel off let me adjust the striker. Now instead of it sticking out 3/16" along the aft edge from the center down, its nice and flush with the rear quarter. It also fixed a clearance problem the car always has had with the passenger front fender.

I also decided to clay-bar the car, the paint on it had become very rough to the touch and after hitting it with a clay-bar I understood why. The pictures below are the clay-bar before use and after going over a one square foot area. Sorry for how blurry they are it was difficult to take them with my left hand.


Now the paint on the car feels like cold glass, its amazing what this clay-bar does and how easy it is. Speaking of glass I did the back window and the windshield with the same results. The clay-bar works great on glass and gets it amazingly clean. We also used it on one of the house windows and it removed all the water spots as easy as if I had wiped them with a paper towel.

Sunday, June 10, 2012

Radiator Support

This weekend I had to replace the radiator support in the Corvette. GM lists this part as a "skid plate" but makes it to self destruct upon contact with anything. It does not appear to be a bad design but more so that it is manufactured poorly. The design of it would appear that it is to protect the bottom nose of the car from parking barriers etc. it also serves as the lower radiator support.

I took the Corvette into the dealership two weeks ago to have some things looked at, one being a popping sound from the rear suspension. The dealership found the lower radiator support broken, told me it was abused and would not be covered by warranty and that they would not be able to find the popping sound until it was fixed, which they would do for the sum of $380.00. I bought one from a GM dealer online for $130.00 and replaced it in a few hours.

My frustration with the whole thing is how poorly the support is welded. It obviously has some damage from rubbing against a parking barrier, but it would not have failed had the welds been adequate. Looking at them its apparent that there was no penetration on the welds and they have excessive porosity.

This is a picture of the end of the support upside down and the "fang" that sticks down below the nose of the car. I took it to show the amount of "abuse" the "skid plate" had sustained.


These are pictures of the poor welds that failed on the part.


Since there is no other damage than the welds pulling apart I plan to have it re-welded and use it as a backup for when the new one I installed does the same thing.

Thursday, June 7, 2012

Project Garage: Week 8

 This weekend I got a lot of stuff done but not much of what I had planned to do.

I finished installing the pegboard and lights in the cabinets. The one to the left is all house items, the one in the center is mostly yard equipment and the one on the right is all automotive. I still have a lot of items to load into it,


I needed to finish the pinstripe in the double bay and behind the work benches. While I had them pulled out from the wall I decided to mount some T8 lights on them and change all the outlets around them from twist locks to standard plugs. This took the better part of the day because the benches had small boxes and were all wired with 10 gauge wire.


I still haven't made a decision on pneumatic lines and will probably wait a bit longer, I think I will work on the lighting next. My last garage has 8ea 4ft 4 bulb fixtures. I think for this one I am going to use the 4ft end to end fixtures. Right now it has 2ea 4ft 2 bulb builder fixtures and is very dimly lit.