Last weekend was my 30th class reunion in Mitchell NE. We decided earlier in the year it might make a nice road trip. Leaving mid week we loaded up the corvette, made sure Matty was set up and headed out. The first leg of the trip we stopped off and spent some time with Andy and Kim, it was a surprise drop in and we had a nice evening with them, I hope they enjoyed it as much as Tania and I did. We left their house late in the evening and stopped for the night in Des Moines IA at 3am. A few hours sleep, a quick shower and something to eat, we were back on the road by 9am. Nothing much beyond stopping to see an old friend in Ogallala we arrived at my dads in Gering NE around 7pm that night.
Friday was the mixer at the Mitchell golf course, Mitchell hasn't changed much in size and pretty much looks the same. I did have a very good time, both with people I hadn't seen in years and the time I got to spend with my dad. The second we spent the morning at the Oregon Trail Days Parade in Gering and that evening for class reunion part 2, we had food catered to the sand pits just outside of town along the Platte River. It was a great place to spend the evening.
On the chance that anyone involved in organizing the weekend reads this I would like to thank them for doing a very thankless task.
Sunday I was able to spend most of the day with my dad and some friends. The corvette had a small issue with the right front tire leaking air and even in the big city of Scottsbluff I was unable to find a tire repair place open on a Sunday. We decided to wait until Monday to drive on to Rapid City so we could have the tire looked at. Monday morning I found a place that took it off and told me it had "sand" in the bead that was causing it to leak. They put it back together and we headed off to Rapid City just before 11am.
The drive to Rapid City had one moment of excitement 40 miles in when a Highway Patrolman wanted to talk to me about how fast my car was. This was the first time I had ever gotten pulled over and didn't care one way or another if I got a ticket, I wasn't going to let it ruin may vacation. I was more upset of it ruining my spotless record of 2.5 years 25k miles without being pulled over in the corvette. After thinking about it more it had been 14-15 years since my last ticket. I got a warning for going 71 in a 65 and the world became a safer place for everyone.
We arrived in Rapid City around 7pm, made our fourth trip of the week to Taco Johns and set out to find Tania's parents house. The following morning Tania's dad played tour guide and we headed into the Black Hills. I was looking forward to this, I had not been in this area since I was a child.
Our first stop was at the Chapel in the Hills, an exact replica of the Borgund stave church in Norway.
The Borgund stavkirke was built around the year 1150 and is considered
the most completely preserved stave church still standing in Norway. The Norwegian Department of Antiquities provided a set of blueprints
of the Borgund church to be used in the construction of the Chapel in
the Hills which was built in 1969.
We were told the trees were selected the bark stripped and left for two years before they were cut down. The Chapel is quite small, maybe room for 20 inside and is used regularly for weddings.
Our next stop was Crazy Horse, the last time I was in the Black Hills there was basically nothing to see so we didn't even go.
Now almost 40 years later there is a face!
The problem is, aside from any special tours that they probably have this is as close as you can get. Because Tania has a fairly decent camera I was able to get some close in shots.
This shows some good detail to the amount of drilling for charge placement.
Here you can see the faint outline of the horses head.
Even though there isn't much of the mountain to see, it was worth the trip there is a lot of other things to see in the museum. I won't go into detail about the place its easy enough to look up on the internet and I wouldn't do the story behind it justice. It is worth looking up though its an interesting story.
After eating lunch at the restaurant at Crazy Horse we drove further up into the hills and into Custer State Park. Dale took us past some of the camp sites he helps set up for Sturgis Bike Week and along the way we passed by Sylvan Lake.
We then drove up through the Needles on our way to Mount Rushmore.
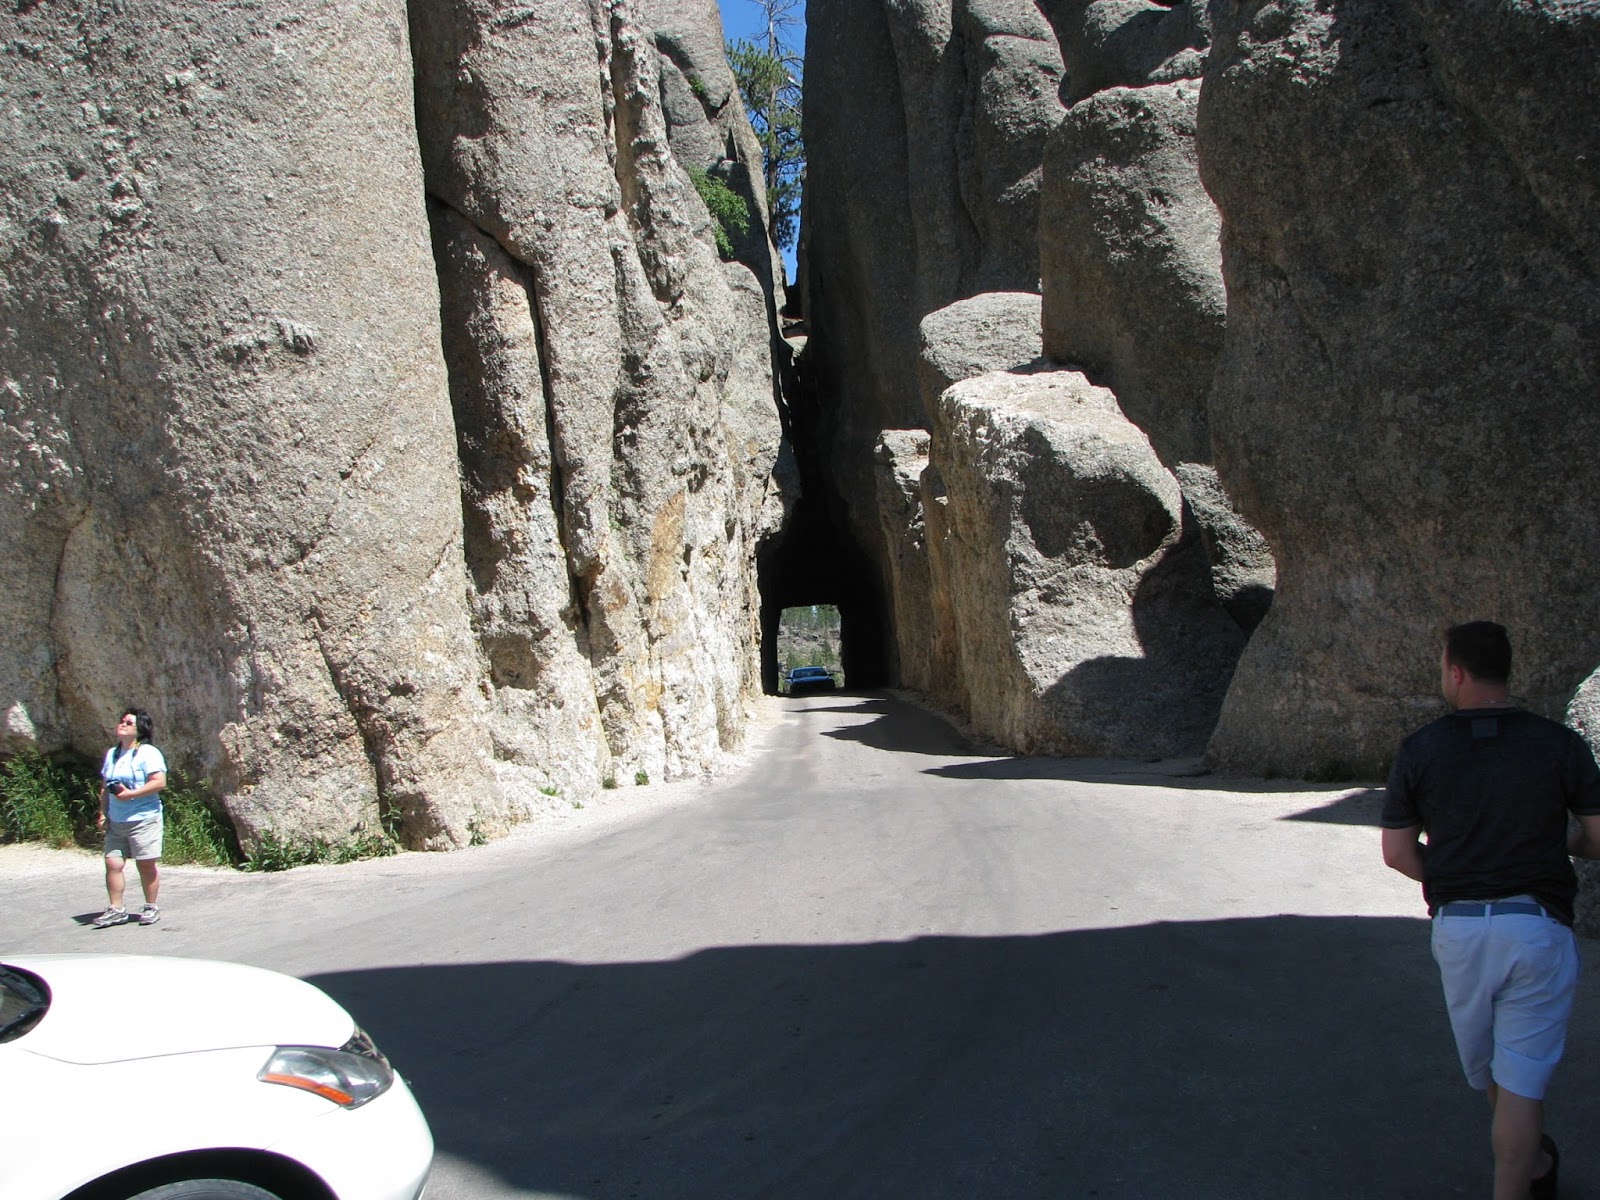
Because we didn't take the highway there we had miles of great views.
Last stop of the day was Mt Rushmore. It is much smaller in scale than Crazy Horse but you are literally a couple hundred yards away versus a mile or more.
The following day we went on through Sturgis, Lead and Deadwood, the only pictures I took with the camera were of a gold mine in Lead.
My understanding is this closed in the late 80's early 90's after 100 years of operation. It is sad that there is no requirement to return the land to some usefulness. Even a quarry lake would look better than this.
We spent some time gambling in Deadwood and the old folks started getting tired so we headed back.
Tania and I left the following day my only regret being that I spent two days on some of the most incredible roads I had seen in a long time.... in a minivan.... while my car sat in their driveway. To add insult to injury as we left Rapid City on I-90 we got to watch a convoy of 200+ corvettes headed to the Black Hills Classic. This group stretched out for over 150 miles.
Thanks to Tania driving a lot of the route home we left Rapid City at around 10:30am and were home by 5am the following morning. Aside from the small problem with the leaky tire the corvette performed flawlessly. All fuel burns were at 30+ mpg except for one. I had to make a conference call so I had Tania drive, after it was over 1.5 hours later I started to relax on the passenger side but something didn't seem right. After looking around the car I noticed she had it in fifth gear and it had been there since she had started driving, that tank was 28.7mpg.
It really was a great trip we had a lot of time and no real time table which made it much more relaxing. We are both looking forward to doing something similar again.
Saturday, July 13, 2013
Matty Door #2
When we got home from vacation, Tania's car was sitting outside, we opened the garage door and Matty's car was torn apart and scattered across the garage.
Apparently while backing out of a parking spot, the passenger door mysteriously came open, hooked on a bush and bent backwards to where it would no longer close.
The further repair plan for that was to remove the damaged door to "figure it out" and occupy the entire garage.
Once I was awake after our trip I presented plan "B" which involved his car being moved out of the garage, a large blue tarp and a trip to the junkyard.
Unfortunately we were not able to find as good of a match as we found for the drivers door, the door we found is in very good condition but is just a little darker silver than the rest of the car.
Apparently while backing out of a parking spot, the passenger door mysteriously came open, hooked on a bush and bent backwards to where it would no longer close.
The further repair plan for that was to remove the damaged door to "figure it out" and occupy the entire garage.
Once I was awake after our trip I presented plan "B" which involved his car being moved out of the garage, a large blue tarp and a trip to the junkyard.
Unfortunately we were not able to find as good of a match as we found for the drivers door, the door we found is in very good condition but is just a little darker silver than the rest of the car.
Sunday, June 9, 2013
Flower Bed
The last two weekends Tania and I have been working on a small wall at the edge of the flower beds around the house. Initially we had discussed continuous curbing, there are many in the neighborhood that have had it installed. I like how it looks on flat areas but don't like the look when the land slopes away from the house. I was also concerned about how it would hold up with the weather cycles here, I was told it is prone to cracking but did no research to verify that. We decided instead to put up a concrete block wall. We found some block at Lowes that matches the brick fairly well and has a look we both like.
The plan is to take it four feet around the tree and back to the forward corner of the house. It will be approximately five blocks high by then. Part 2 will be running a two block high wall down the side of the house. I am hoping this will be easier as the ground is level to the house.
We have used approximately 80 blocks to this point with another 90 or so still in the back of the truck. It has been very slow going so far because we have been leveling every block. I don't want to go back and fix this wall in a year, so hopefully time spent now will be worth it.
The plan is to take it four feet around the tree and back to the forward corner of the house. It will be approximately five blocks high by then. Part 2 will be running a two block high wall down the side of the house. I am hoping this will be easier as the ground is level to the house.
We have used approximately 80 blocks to this point with another 90 or so still in the back of the truck. It has been very slow going so far because we have been leveling every block. I don't want to go back and fix this wall in a year, so hopefully time spent now will be worth it.
Sunday, March 31, 2013
Sager
After the "reflow" of my P-7811FX I decided to start looking for its replacement. Initially I had debated building a desktop because of the cost but decided the portability outweighed the cost savings. Not being able to find a 17" laptop with a display comparable to my old laptop I stopped looking at the major laptop sellers and started looking at some of the boutique sellers. These tend to cost more due to their low volume, customization and services offered. During this search I came across an ODM (original design manufacturer) called Clevo who builds bare bones systems used by major companies such as Dell/Ailenware, Falcon Northwest, Hypersonic and VooDoo PC (HP). One of the lessor known companies that use Clevo bare bones systems is Sager.
Sager is known for building high end gaming laptops and while you can purchase one directly from them they are sold at the same price from multiple re-sellers who compete with each other by offering different customization features such as upgraded thermal compound, additional heat sinks, customized skins or even paint. Because laptops are so proprietary, and limited in upgradeability purchasing one is a fine line between what you need it to do and spending as much as you can afford. Adding the requirements for it to play games and the cost goes out of control.
The laptop that caught my eye and I ended up purchasing was the Sager NP 9370. I ordered mine built to the following specs:
• 17.3" Full HD LED 120Hz 72% NTSC Color Gamut Matte (1920 x 1080)
• Dual NVIDIA® GeForce™ GTX 680M's total 8GB GDDR5 in SLI
• 3rd Generation Intel® Core™ i7-3630QM Processor (6M Cache, up to 3.40 GHz)
• Genuine Microsoft Windows® 7 Professional 32/64-Bit Edition ( 64-Bit Preloaded )
• 16GB Dual Channel DDR3 SDRAM at 1600MHz - 2 X 8GB
• 750GB 7200rpm SATA 300 Hard Drive
• 6X BD-R Blu-ray Burner 8X DVD±R 2.4X +DL Super Drive
• Intel® Centrino™ Ultimate-N 6300 - 802.11A/B/G/N Wireless LAN Module
• Removable Smart Lithium-Ion battery pack (8 cell)
• Integrated Fingerprint Reader
This laptop on release last summer was the most powerful commercially made laptop available, since then it has been surpassed by at least one I am aware of and its even questionably a laptop. It is made by Clevo (9570), uses desktop components, needs two power bricks to power it, 2.5" thick and weighs in excess of 12lbs (not including the two huge power bricks).
After receiving my new laptop I installed another 8GB of DDR3 in the remaining two slots to bring the total up to 24GB. I also installed a 128GB Samsung SSD, both of which were from my old laptop.
Sager while being known for performance gaming laptops is not known for flashy looks and in some cases borderline fit and finish, this is reflected in the cost of their systems. I am fine with that because the performance of this system is incredible.
I could have purchased it with one GTX680 GPU and had a laptop capable of playing any current game at all but the most extreame settings. Instead I chose to spend the cash and get two of them in the system. This is overkill for anything but gaming but in my mind extends the useful life of the system.
The GPUS are under the fan/heatskink assemblies on the left and right sides of the laptop. They are the fastest currenly available mobile GPUs and are replaceable cards. The Quad Core i7 is cooled by the fan/heatsink assembly in the center.
The one glitzy feature that it does have is a programable backlit keyboard, which does everything from a standard color to disco lighting.

Up till now I have not been able to spend a lot of time with it, but I am very happy with what I have seen so far.
Sager is known for building high end gaming laptops and while you can purchase one directly from them they are sold at the same price from multiple re-sellers who compete with each other by offering different customization features such as upgraded thermal compound, additional heat sinks, customized skins or even paint. Because laptops are so proprietary, and limited in upgradeability purchasing one is a fine line between what you need it to do and spending as much as you can afford. Adding the requirements for it to play games and the cost goes out of control.
The laptop that caught my eye and I ended up purchasing was the Sager NP 9370. I ordered mine built to the following specs:
• 17.3" Full HD LED 120Hz 72% NTSC Color Gamut Matte (1920 x 1080)
• Dual NVIDIA® GeForce™ GTX 680M's total 8GB GDDR5 in SLI
• 3rd Generation Intel® Core™ i7-3630QM Processor (6M Cache, up to 3.40 GHz)
• Genuine Microsoft Windows® 7 Professional 32/64-Bit Edition ( 64-Bit Preloaded )
• 16GB Dual Channel DDR3 SDRAM at 1600MHz - 2 X 8GB
• 750GB 7200rpm SATA 300 Hard Drive
• 6X BD-R Blu-ray Burner 8X DVD±R 2.4X +DL Super Drive
• Intel® Centrino™ Ultimate-N 6300 - 802.11A/B/G/N Wireless LAN Module
• Removable Smart Lithium-Ion battery pack (8 cell)
• Integrated Fingerprint Reader
This laptop on release last summer was the most powerful commercially made laptop available, since then it has been surpassed by at least one I am aware of and its even questionably a laptop. It is made by Clevo (9570), uses desktop components, needs two power bricks to power it, 2.5" thick and weighs in excess of 12lbs (not including the two huge power bricks).
After receiving my new laptop I installed another 8GB of DDR3 in the remaining two slots to bring the total up to 24GB. I also installed a 128GB Samsung SSD, both of which were from my old laptop.
Sager while being known for performance gaming laptops is not known for flashy looks and in some cases borderline fit and finish, this is reflected in the cost of their systems. I am fine with that because the performance of this system is incredible.
I could have purchased it with one GTX680 GPU and had a laptop capable of playing any current game at all but the most extreame settings. Instead I chose to spend the cash and get two of them in the system. This is overkill for anything but gaming but in my mind extends the useful life of the system.
The GPUS are under the fan/heatskink assemblies on the left and right sides of the laptop. They are the fastest currenly available mobile GPUs and are replaceable cards. The Quad Core i7 is cooled by the fan/heatsink assembly in the center.
The one glitzy feature that it does have is a programable backlit keyboard, which does everything from a standard color to disco lighting.

Up till now I have not been able to spend a lot of time with it, but I am very happy with what I have seen so far.
Sunday, March 24, 2013
Laptop Repurpose
It has been quite a while since I posted last. I have been literally buried by work and during that period that after four plus years of faithful service, my beloved P-7811FX laptop decided to die. The P-7811FX was a loss leader built by Gateway exclusively for Best Buy. It had some bleeding edge features such as DD3 SDRAM, a 17" 16:10 WUXGA screen with a native resolution of 1920 x 1200 and a Labelflash DVD burner. This laptop was priced around $1200.00, much less than comparable laptops at the time and probably much less than it cost to build. It apparently was only built for a few months and replaced with a new improved model that was actually a step down specification wise.
The problem with it was it had a design flaw which was basically a time bomb. Some of them failed within days or even weeks of being purchased, some like mine lasted much longer. The flaw was in the switching of the GeForce 9800M GTS video card. When the 3D side of the card was not in use and you wanted to play a game with the laptop it had issues switching, this required a software solution that forced the 3D card to work all the time. This created a lot of heat in a card which was notorious for running hot and cooked the motherboard.
This was a problem with nearly all laptops that used the GeForce 9800M GTS and is well documented on many fourms. There are only two fixes for this issue, one is to buy a new motherboard, knowing that it too will die really at anytime. The second was another band aid fix which is "reflowing" the motherboard.
Reflowing is where the solder on the motherboard is briefly melted to allow it to reflow. This fixes the problems created by the video chip overheating and cooling which develops stress cracks and cold solder joints at the chip to motherboard connections. These connections are much to small to solder with an iron.
There are businesses that do this work professionally as it is also a common problem with X-Box 360s. The cost for this service is anywhere from $100.00 - 200.00, with a very limited guarantee for the life of the work. Generally it is done with the following type of equipment which localizes the heat to just the GPU area.
I disassembled the laptop to the motherboard, wrapped all of it in foil except for the GPU and baked it in the oven. Before I did this the laptop would boot up but had a blank display, after reflowing it the laptop worked flawlessly. The problem is like I stated earlier this is a band aid repair and after 1.5 months of use it started to fail again.
Not wanting to discard the laptop due to a failed video card I started searching my options. There are some external video cards but they don't do what I want and aren't a very graceful solution. So I decided to repurpose the laptop parts and started searching for how I could do that. Again the solutions were extremely limited, laptops for one are very proprietary and secondly the mobile architecture they are based on is completely different than a desktop.
In searching for socket "P" motherboards I found that a couple different ones were made, the problem being "were made" as in they are no longer made. They were not common, not popular and very expensive. Finally I found a solution on Ebay in the form of an AOpen i45GMt-HD mini ITX board that was based on the socket "P" Penryn chip.
This board when it was still being built sold for a mere $309.00, I was able to get a new one along with an AOpen case designed for it for less than $70.00. This allowed me to use the 2.26 Core 2 Duo, Centrino wireless card, hard drive and optical drive from the P-7811FX. Unfortunately the board was built around DDR 2 memory so I had to buy some DDR 2 SODIM's.
The neat thing about this computer is its very small, the motherboard is 6"x6", it is completely fanless, the large heatsink came with the motherboard as well as a power brick to meet its 19VDC requirements. When it is on and running it is completely silent. It is able to display HD broadcast TV as well as receive HD radio.
Initially I had planned on putting the motherboard in my car as the basis for a carputer but because of the 19VDC requirements of the board it limited my power supply options. I am going to leave it as it is now and use it as a garage computer / file server.
Here is a shot of the front of it showing the optical drive from the P-7811FX.
The problem with it was it had a design flaw which was basically a time bomb. Some of them failed within days or even weeks of being purchased, some like mine lasted much longer. The flaw was in the switching of the GeForce 9800M GTS video card. When the 3D side of the card was not in use and you wanted to play a game with the laptop it had issues switching, this required a software solution that forced the 3D card to work all the time. This created a lot of heat in a card which was notorious for running hot and cooked the motherboard.
This was a problem with nearly all laptops that used the GeForce 9800M GTS and is well documented on many fourms. There are only two fixes for this issue, one is to buy a new motherboard, knowing that it too will die really at anytime. The second was another band aid fix which is "reflowing" the motherboard.
Reflowing is where the solder on the motherboard is briefly melted to allow it to reflow. This fixes the problems created by the video chip overheating and cooling which develops stress cracks and cold solder joints at the chip to motherboard connections. These connections are much to small to solder with an iron.
There are businesses that do this work professionally as it is also a common problem with X-Box 360s. The cost for this service is anywhere from $100.00 - 200.00, with a very limited guarantee for the life of the work. Generally it is done with the following type of equipment which localizes the heat to just the GPU area.
I disassembled the laptop to the motherboard, wrapped all of it in foil except for the GPU and baked it in the oven. Before I did this the laptop would boot up but had a blank display, after reflowing it the laptop worked flawlessly. The problem is like I stated earlier this is a band aid repair and after 1.5 months of use it started to fail again.
Not wanting to discard the laptop due to a failed video card I started searching my options. There are some external video cards but they don't do what I want and aren't a very graceful solution. So I decided to repurpose the laptop parts and started searching for how I could do that. Again the solutions were extremely limited, laptops for one are very proprietary and secondly the mobile architecture they are based on is completely different than a desktop.
In searching for socket "P" motherboards I found that a couple different ones were made, the problem being "were made" as in they are no longer made. They were not common, not popular and very expensive. Finally I found a solution on Ebay in the form of an AOpen i45GMt-HD mini ITX board that was based on the socket "P" Penryn chip.
This board when it was still being built sold for a mere $309.00, I was able to get a new one along with an AOpen case designed for it for less than $70.00. This allowed me to use the 2.26 Core 2 Duo, Centrino wireless card, hard drive and optical drive from the P-7811FX. Unfortunately the board was built around DDR 2 memory so I had to buy some DDR 2 SODIM's.
The neat thing about this computer is its very small, the motherboard is 6"x6", it is completely fanless, the large heatsink came with the motherboard as well as a power brick to meet its 19VDC requirements. When it is on and running it is completely silent. It is able to display HD broadcast TV as well as receive HD radio.
Initially I had planned on putting the motherboard in my car as the basis for a carputer but because of the 19VDC requirements of the board it limited my power supply options. I am going to leave it as it is now and use it as a garage computer / file server.
Here is a shot of the front of it showing the optical drive from the P-7811FX.
Sunday, December 16, 2012
Dry Cut Saw
I have been watching CL a while now for a abrasive chop saw. Last
weekend I came across a new listing for a 14" Milwaukee dry cut saw,
"barely used" for $200.00.
I only know a small bit about dry or cold cut saws and would normally research more before buying but this seemed like a deal I needed to jump on. It appears that the owner did not properly clamp whatever he was cutting. The blade was deflected into the edge of the throat causing only minor damage to the base.
Unfortunately the blade did not fare as well, initially I thought it was only a couple of broken teeth so I tried to remove it and found the outer flange had rotated on the spindle shaft
After fighting with it for over an hour I was able to get the flange off the spindle shaft. The damage was limited to the outer flange which I was able to order for less than $3.00.
The blade had damage to over 1/3 of the teeth, at $5.00 a tooth to replace I started looking for a new one. Because I didn't research this in advance I had no idea that ferrous dry cut blades were that expensive. The cheapest I could find a Milwaukee blade was in the $150 range with most other brands being $80 - $100. Even with buying a new blade the total cost would still be less than buying a new saw but more than I had planned on investing.
This week I debated selling the saw as is and looking again for a abrasive chop saw when I found a HD link selling the original blade for $35.97ea. Needless to say I selected 2 and blasted through the checkout pages.
I only know a small bit about dry or cold cut saws and would normally research more before buying but this seemed like a deal I needed to jump on. It appears that the owner did not properly clamp whatever he was cutting. The blade was deflected into the edge of the throat causing only minor damage to the base.
Unfortunately the blade did not fare as well, initially I thought it was only a couple of broken teeth so I tried to remove it and found the outer flange had rotated on the spindle shaft
After fighting with it for over an hour I was able to get the flange off the spindle shaft. The damage was limited to the outer flange which I was able to order for less than $3.00.
The blade had damage to over 1/3 of the teeth, at $5.00 a tooth to replace I started looking for a new one. Because I didn't research this in advance I had no idea that ferrous dry cut blades were that expensive. The cheapest I could find a Milwaukee blade was in the $150 range with most other brands being $80 - $100. Even with buying a new blade the total cost would still be less than buying a new saw but more than I had planned on investing.
This week I debated selling the saw as is and looking again for a abrasive chop saw when I found a HD link selling the original blade for $35.97ea. Needless to say I selected 2 and blasted through the checkout pages.
Sunday, October 21, 2012
Staycation
I took a staycation this week, Matty was off on fall break and I had a lot of time built up. The week started with Tania waking me up at 6:30 Monday morning to tell me her car was broken. Long story short a diode went out in her alternator taking the battery out with it. Not wanting to spend $150.00 on a tension unloader and not being able to rent one didn't help with the repairs. The alternator was non stock and the battery was Delco which took me two hours at the dealership to warranty, this meant my staycation started on Wednesday.
Last week I ordered a heads up display for the corvette, it is something I have wanted to put in it since I got it. My intent was to start putting it in Monday morning, but started it on Wednesday, The unit I ordered came as a kit with the HUD unit, control panel, bezel and wiring harness. All of the parts are GM except the harness. My corvette is a 2LT trim package, the HUD was part of a 3LT trim package that included memory heated seats and mirrors, 6 disk CD changer and a telescopic steering wheel. Nice stuff but not worth the $3,000.00 price tag. The HUD kit I purchased was $400.00 shipped.
This upgrade is very common for corvette owners, except most of them will cut the ducting to the driver side register to get the HUD unit in the dash. Once it is installed they tape it up with duct tape, which saves hours on the installation. Because I had plenty of time and didn't want to cut the duct I did it the hard way and removed the dash. Just above the steering column you can see the HUD between two ducts the top duct is the one that gets cut in two places for the easy install.
To get that far I had to remove all this stuff....
The install took me about 8 hours total, I was in no hurry and I chose to solder the harness into the factory harness. The kit comes with wire tap connectors which are garbage for reliability. Matty was the official soldering iron holder and helped me finish up the installation.
I took a few pictures of the HUD, its next to impossible to take a clear picture of it but it is quite clear to the naked eye. It has multiple modes and can be configured in different ways, the pictures I took were of the three basic modes.
This is the standard street mode that will display blinkers, radio stations, fuel status etc. It can also be configured with one of two tachometers.
Last week I ordered a heads up display for the corvette, it is something I have wanted to put in it since I got it. My intent was to start putting it in Monday morning, but started it on Wednesday, The unit I ordered came as a kit with the HUD unit, control panel, bezel and wiring harness. All of the parts are GM except the harness. My corvette is a 2LT trim package, the HUD was part of a 3LT trim package that included memory heated seats and mirrors, 6 disk CD changer and a telescopic steering wheel. Nice stuff but not worth the $3,000.00 price tag. The HUD kit I purchased was $400.00 shipped.
This upgrade is very common for corvette owners, except most of them will cut the ducting to the driver side register to get the HUD unit in the dash. Once it is installed they tape it up with duct tape, which saves hours on the installation. Because I had plenty of time and didn't want to cut the duct I did it the hard way and removed the dash. Just above the steering column you can see the HUD between two ducts the top duct is the one that gets cut in two places for the easy install.
To get that far I had to remove all this stuff....
The install took me about 8 hours total, I was in no hurry and I chose to solder the harness into the factory harness. The kit comes with wire tap connectors which are garbage for reliability. Matty was the official soldering iron holder and helped me finish up the installation.
I took a few pictures of the HUD, its next to impossible to take a clear picture of it but it is quite clear to the naked eye. It has multiple modes and can be configured in different ways, the pictures I took were of the three basic modes.
This is the standard street mode that will display blinkers, radio stations, fuel status etc. It can also be configured with one of two tachometers.
The next two are "Track 1" and "Track 2" they are basically the same, the only real difference being the way the tachometer is displayed. What is visible with these two and not on the street mode is the "G-Meter" across the bottom which reads lateral G's.
Friday I had contractors over as a follow up to our one year walk through of the house. They fixed a couple areas that were squeaking on the hardwood floor and quite a bit of sheet rock work. That occupied most of my day and lead to Saturday being paint day for Tania and I. Tomorrow, weather permitting I am going to take another try at getting some of the vinyl stripes off Matty's car. Then it will be back to work where I will start to think about when I can take a vacation.
Monday, October 1, 2012
Braided Steel Brake Lines
Today I swapped out the rubber flex lines for braided steel lines on the Corvette, The braided lines will not expand like the rubber ones do which makes the brake pedal much firmer and provides better feedback.
Because the car does have over 30k on it now the cast aluminum suspension pieces and the cradles have a lot of road grime on them. I decided to clean them up while I had the wheels off the car. Napa sells a product called "Aluminum Brightener" it contains hydrofluoric, sulfuric and phosphoric acids. With all that bad stuff you know it works great.
Before:
After, I never touched the aluminum parts only wiped down the plastic with an old wash mitt, I spent maybe five minutes cleaning this area.
The rear suspension was much dirtier, this picture is after I sprayed it once and let it set for 30 seconds.
Finished about five minutes later.
Because the car does have over 30k on it now the cast aluminum suspension pieces and the cradles have a lot of road grime on them. I decided to clean them up while I had the wheels off the car. Napa sells a product called "Aluminum Brightener" it contains hydrofluoric, sulfuric and phosphoric acids. With all that bad stuff you know it works great.
Before:
After, I never touched the aluminum parts only wiped down the plastic with an old wash mitt, I spent maybe five minutes cleaning this area.
The rear suspension was much dirtier, this picture is after I sprayed it once and let it set for 30 seconds.
Finished about five minutes later.
Sunday, September 30, 2012
Mural Pt 3
Yesterday I finished my wall mural, I added some shading, a emblem, license plate frame and the Corvette script.
I have been searching for some other posters or banners to put up, most of what I have found was either smaller than I wanted, over $100.00 or was way too expensive for shipping. Saturday I decided to give Walgreen poster service a try, for $30.00 they will print a non copy-write picture at 24"x36". I have been working on modifying a picture I took a few weeks ago, I uploaded it and 30 minutes later I got an email informing me it was ready.
The camera picked up some reflection off the plexiglass covering the print, the quality of the print was quite good.
I have been searching for some other posters or banners to put up, most of what I have found was either smaller than I wanted, over $100.00 or was way too expensive for shipping. Saturday I decided to give Walgreen poster service a try, for $30.00 they will print a non copy-write picture at 24"x36". I have been working on modifying a picture I took a few weeks ago, I uploaded it and 30 minutes later I got an email informing me it was ready.
The camera picked up some reflection off the plexiglass covering the print, the quality of the print was quite good.
Friday, September 21, 2012
First Snow
Tonight we had our first snowfall of the year or a really bad hail storm, who can tell in Indiana.
This is a shot of the street to the side of our house, it was flooded completely across within 5 minutes.
This is a shot out the back after the 60mph winds tossed all of our rather heavy aluminum lawn furniture.
Here is some drifting along the side of the house. Four hours later its still raining and most of the drifts are still there many in the streets.
This is a shot of the street to the side of our house, it was flooded completely across within 5 minutes.
This is a shot out the back after the 60mph winds tossed all of our rather heavy aluminum lawn furniture.
Here is some drifting along the side of the house. Four hours later its still raining and most of the drifts are still there many in the streets.
Subscribe to:
Posts (Atom)